Native gravel gardening

Madison Area Master Gardener Program Completion

As I hoped, the first year at Sprout Landscape & Garden was very busy. But from the beginning, I wanted to work in time to learn more about the local gardening community. To do so, I chose to enter the Wisconsin Master Gardener Volunteer training program through the UW Extension office. The program spanned an entire growing season, beginning in late February and wrapping up in early September. As of this past Thursday, I officially became a certified Wisconsin Master Gardener Volunteer!

Elvehjem School Garden Summer 2014

The Elvehjem Elementary School education garden- Summer 2014

I really enjoyed integrating the program into my schedule. It exposed me to plenty of new great gardening knowledge, tips and resources. Every-other-week classes covered very useful topics, such as soils, composting, garden-based learning for kids, tree and shrub pruning, insects, plant disease, weeds and invasive plants, organic garden techniques, vegetables, houseplants and more.

Besides the classes, the other main component of the program is volunteering. The program promotes volunteering with many local school gardens and other community gardens. I spent my volunteer hours at Elvehjem Elementary, the UW Extension education gardens, and Olbrich Botanical Gardens, totally nearly 100 hours of volunteer hours!

Every Thursday morning at Olbrich, I helped a small crew perform a variety of gardening tasks throughout the grounds. These including weeding, plantings, pruning, mulching, and fruit harvesting. I valued the hands-on experience, watching how the gardens changed throughout the year, and working with the friendly, down-to-earth staff and other volunteers.

Grapes harvested by our volunteer group

Grapes harvested by our volunteer group

The community of Master Gardener’s is a close-knit group, and I appreciate becoming part of their movement for education and involvement in our community’s gardens.

Particular thanks to our instructor, Lisa Johnson, who’s personality and wealth of knowledge made for a fun, insightful program.

For more information on the Madison Area Master Gardener Association, please follow the link.

winterizing your chicken coop

Petscaping: Winter-izing Your Coop

As much as we don’t really want to think about winter yet, now is the time to start winterizing your chicken coop and taking steps to protect your ladies during the cold temps. Here in Wisconsin, we need to be take extra precautions in the winter due to extreme temperatures like last year.

Most grown chickens will survive winters in colder climates, but some breeds are hardier than others. (Chicks are another story, and we don’t recommend getting chicks as winter approaches.)

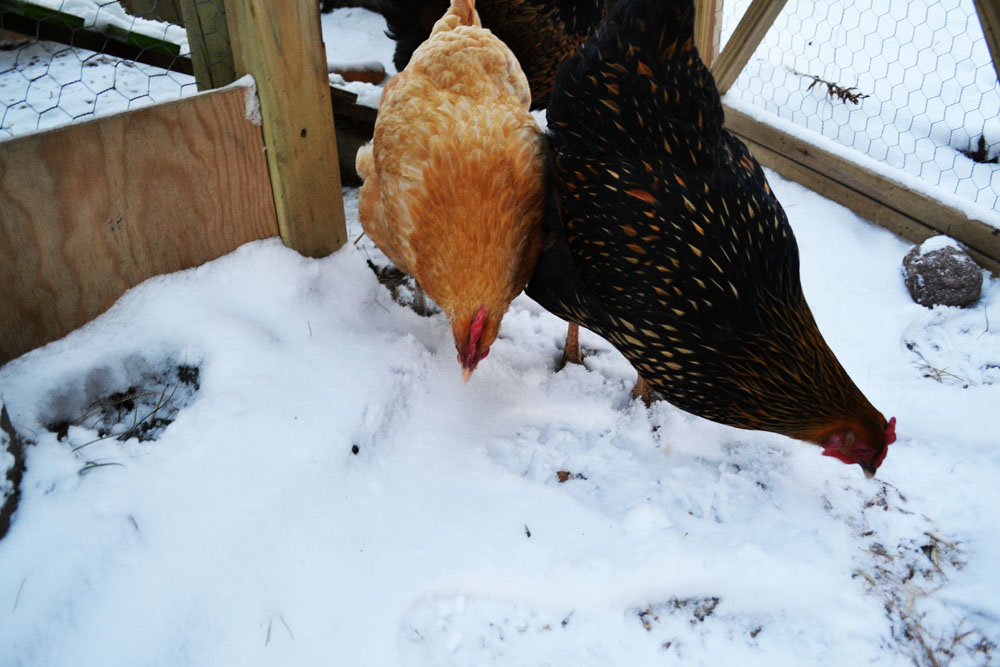
We have 2 buff Orpingtons and 1 black Australorp, which we chose because they are known for their docile personalities and being cold hardy. Some of the other cold-hardy breeds include Wyandottes, Rhode Island Reds, New Hampshire Reds, Barred Rocks, Delawares, Brahmas, according to our research. Cold hardy breeds may have smaller combs and wattles, thicker feathers, and be better layers during the winter.
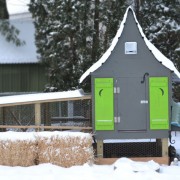
The Coop

As new chicken owners, we find one of the trickiest things about winter is sorting through all the recommendations and warnings. It’s recommended to have a well-insulated coop with good ventilation, but not drafty, especially near the roost. How does one know what the right amount of ventilation or insulation is? I guess it’s a lot like parenting: you can Google questions all day long, but in the end, you may just need to use your instincts.

Because chickens spend a lot more time inside their coop in the winter, there is more moisture from their breath and from their droppings. Cold and damp conditions are unhealthy for your chickens and could even cause frostbite. If you notice your ladies’ combs and wattles looking whitish (rather than pink) try rubbing petroleum jelly on them every few days to protect them from frost bite. If this is an ongoing problem, it may be an indication you need more ventilation in the coop. Good ventilation allows dissipation of moisture, but a cold draft near roosting hens could be fatal.

Having a protected area away from the wind in your pen or yard gives your chickens room to scratch without getting chilled. We wrapped much of our pen in plastic last year (while maintaining adequate ventilation) as well as using clear fiberglass on top to keep snow out while letting sunlight in. If the area is snow and ice packed, add a thick layer of hay to help insulate their feet.

The Heated Debate

There is quite a bit of debate about whether one should heat a chicken coop or not. Most of the articles we have read recommend against it. Sources say most adult chickens can live in cold weather down to about 0 degrees Fahrenheit without issues.

A common argument against heating the coop is that a heat-lamp running all winter is a fire hazard. Others say preserving a warmer temperature causes chickens to feather out only in light down and not their full winter down. If you lose power for some reason, the chickens aren’t acclimated to the colder temperatures and could die. Wide fluctuation in temperature is reportedly harder on chicken constitutions than a consistent chill.

If you choose to heat your coop, make sure to hang the heat bulb with sturdy clips or on a permanent fixture away from where chickens can touch it. If you plan to have chickens for a long time, consider wiring your coop, which is much safer than using extension cords.

chickens in the snow

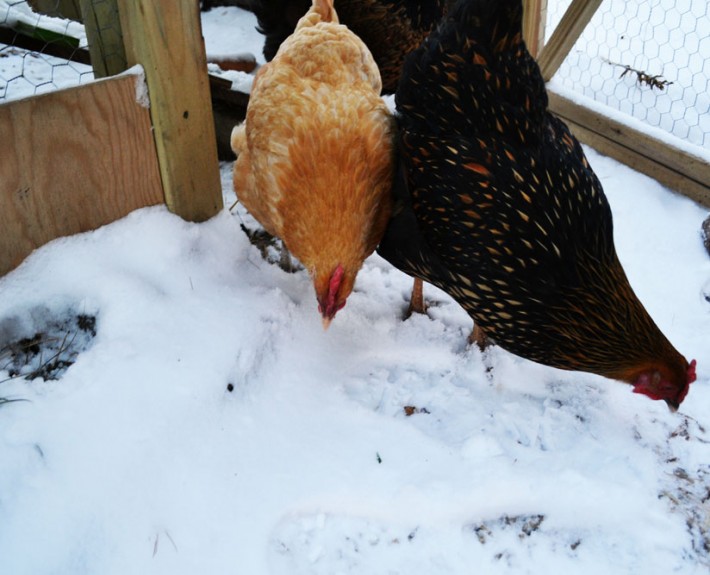
While our chickens didn’t want to walk on the snow, they did enjoy eating it!

Food & Water

Whether you choose to heat your coop or not, it is critical that your chicken’s water supply does not freeze! A heated base for your water feeder is invaluable in the winter. And chickens cannot live long without fresh water, so you still need to refresh the water daily. If you don’t have electricity in your coop for a water heater, you should bring the water feeder inside every night and return it in the morning. Then you should check the water once or twice during the daytime to make sure it’s not frozen, especially on really cold days.

Our chickens seemed pretty miserable during the winter last year, so we tried to make them a bit happier by giving them extra treats. They aren’t getting nutrients from grass, plants and bugs like they do in warmer weather, so their diets could use a few supplements. In addition to traditional feed, table scraps and vegetables will keep the flock hardy. A dose of cracked corn an hour to two before bed will help naturally increase their body heat to help keep them warm.  We also give them bird seed, oats, berries, dried meal worms and yogurt. Like with humans, yogurt reportedly boosts chickens immune systems. Plus it’s hilarious to watch them eat it.

We wish you luck getting yourselves and your flock ready for the winter. Let’s hope it’s not as cold as last year!

Miniature Gardening Ideas

It’s true that we’ve become a little obsessed with miniature gardening this year. Because of our backyard chickens, we must keep our tiny creations in pots or other containers on our deck so they don’t get destroyed.

Here are three mini gardens we created this year, which should give you some good ideas for your own tiny landscaping projects.

mini-gardening-ideas

Miniature Garden #1

This garden was created in a standard planting pot. We filled it with potting soil and sculpted some little hills out of potting soil. We found some tiny rocks for the retaining wall and natural stone staircase. Note: you’ll need to use mud made out of a clay-filled dirt to hold these rocks together as the potting soil won’t hold together. Making the retaining wall was quite a lot of detail work and it get’s awfully messy, which is of course the best part! I like to keep a spray bottle of water handy when doing rock work like this.

mini-gardening-ideas-3

I used Irish moss for the top pathway, which took a few months to fill in as I didn’t have enough to quite cover the area. You will notice a few tops of acorns turned upside down on the top. Those don’t serve any purpose, but I like using natural materials as much as possible and acorns are so cute. Then I used some moss that I found in a stream bed by my lovely mother-in-law’s house for the ground. This moss doesn’t grow nearly as long as the Irish moss, so it was more suitable for the bottom of the garden so the chair stayed put. Also notice how it started to fill in between the rocks!

tiny-landscapes

Miniature Garden #2

This miniature landscape was created in a used Medicine cabinet that I found at the ReStore. You’d be amazed at the stuff you can find there, and it made for an interesting container. The main feature of this mini garden is the metal bridge, which I bought here in Madison at Olbrich Garden’s gift shop. They have some adorable pieces that you must check out if you are a mini gardener.

tiny-landscapes-2

For the plants, I used sedum, which is my favorite groundcover / succulent. You can see a different variety of Irish moss that is cut by a blue stone path. The other side of the garden is covered with oregano, which I discovered is a nice low growing plant for tiny landscapes. And then you’ll see the creeping Jenny pouring out of the sides. This may be a bit of a rambunctious grower for a mini garden, but it has some nice fall color, doesn’t it? I sprinkled some pine cones and other natural rocks around, and created a dry riverbed beneath the bridge.

fairy-garden-ideas

Miniature Garden #3

This garden has already been featured on this blog, but the moss has filled in so nicely that I wanted to show you an updated photo. Click here to read the original article.

Residential Landscape Design

Madison Parade of Homes 2014

Do It Yourself Landscape Plan for Homeowners

We are so excited for the opportunity to have created the landscape design for one of the 2014 Madison Parade of Homes entries! This gorgeous new home is located in Bristol Gardens in Sun Prairie, Wisconsin. The home was built by Farnsworth Builders.

DIY landscape plansSprout Landscape & Garden created a do-it-yourself (DIY) landscaping plan for the homeowners who were excited to put some sweat equity into their new home. But there were some things the homeowners needed assistance on, so Sprout provided guidance and additional manpower as needed. At Sprout, we’re here to help, and we can provide as much or as little help as needed!

The focus of this do-it-yourself design was low maintenance plantings and beds. The choice of plants and spacing will allow for maximum future growth and reduce the amount of pruning and maintenance in the future. The beds were lined with weed barrier fabric and covered in a native washed stone for low maintenance.
But keep in mind, there is no such thing as “no-maintenance landscaping!” Every landscape takes some care.

If you have a yard, you will have to give it some care. But knowing the right plants and building materials can drastically reduce the amount of time you spend pruning, weeding, watering and managing your landscape. And of course planting the right plants in the appropriate places will reduce maintenance and increase the likelihood of survival, saving you money and time in the long run.

The other consideration with the plant selection in this Parade of Homes design was to make sure they are wind resistant. In new developments, wind can be a problem. We chose trees such as bur oak and greenspirelinden for their hardy nature. They will withstand much more extreme wind conditions than, for example, a soft wood maple.

Another important feature in this design is that the homeowners wanted plants that would be blooming all season and have a variety of fall colors. For this, we choice trees such as serviceberry for its characteristics. The serviceberry has lovely white flowers in the spring, attractive fruits that birds love to eat, and beautiful fall tones of orange, yellow and red.

See below for the a close-up of what you can expect for a do it yourself landscape design and please contact us today if you are interested in learning more!

diy landscape ideas


Rabbit Damage In The Landscape

Winter Rabbit Damage

Nothing can be more frustrating than winter damage on plants caused by wildlife. Rabbits, in particular, can cause major damage in the winter, especially to thinner, more tender shrubs. More established plants, such as this Bridal Wreath Spirea and Eastern Redbud, will be able to recover from the winter grazing and naturally heal over their wounds.

Tree Damage from Rabbits

Eastern Redbud

Rabbit Shrub Damage

Bridal Wreath Spirea


This winter has resulted in a higher amount of rabbit damage than normal. The weather was colder and produced more snow than typical winters, where rabbits and other wildlife had a more difficult time finding food. Because of their desperation, you may see damage to shrubs or other plants you’ve never noticed before. This spring, keep an eye on plants that experienced rabbit damage. You may be surprised to find that many will naturally recover, possibly even thrive from a “natural pruning”, while others may be beyond reasonable repair.

Winter Plant Damage

Ping Pong Buttonbush

When assessing rabbit damage, consider selective pruning as an alternative. Seen on the photo to the left, this young Buttonbush had almost all its stems bit off, leaving only one older stem. For a more attractive, healthy plant, prune the nubs left by the rabbits by pruning the stem down to the next bud, remove odd looking stems (such as the one older stem), then allow spring growth to emerge. Soon, this shrub will pick up where it left off, being a step behind in growth, but still in tact. Flowering may not be present this coming season, because of the extent of damage.

Once the leaves fall next Autumn, plan to protect the plants you discovered can be a favorite of the neighborhood rabbits from future winter damage. Wrapping plants with fine, black netting (also called deer netting-see photo below) is a great way to keep the plant protected from critters, while still allowing the plant to breath and receive sunlight. Make sure and secure the netting around the bottom of the plant to protect the main stem and keep the netting from becoming compromised.

Prevent Rabbit Damage In Your Landscape

Black Netting