How to Build a Vertical Succulent Garden
Building vertical gardens or “live walls” are all the rage. You’ve seen these on Pinterest and Better Homes & Gardens magazine, but have you actually seen one of these in real life? These living walls (also called living pictures) are an exciting way to decorate with plants indoors or outdoors, especially when you’re short on space. If you’re looking for a fun weekend gardening project, check out this tutorial on constructing your own vertical succulent garden with a custom hanging planter.
Step 1: Get Your Succulent Plants & Supplies
Supplies and tools needed are:
- 2×4’s (best to get treated wood)
- Galvanized hardware cloth
- Galvanized nails or screws
- Staple gun / staples
- A drill
- A hammer
- Wire cutters
- Gloves
- Garden / landscape fabric
- A miter saw
- Paint / paintbrush (optional)
- Scrap wood, reclaimed wood or an old picture frame (optional)
- Cactus Potting Soil (see below for mixing your own)
- Various Succulent Plants
- Steel hooks with brackets for hanging
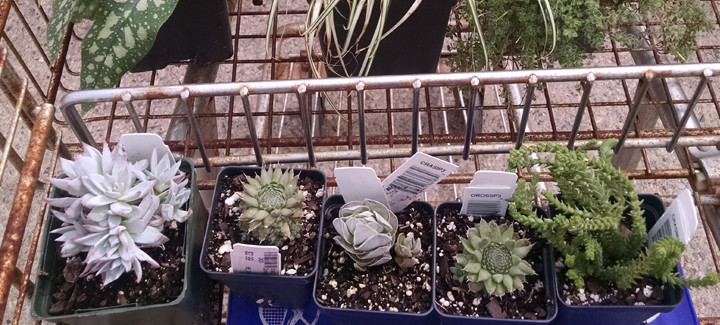
Succulent plants bought in Madison for drought-tolerant succulent wall planter.
Succulents are great plants for this project because they are beautiful, low maintenance and need very little water. They are also easy to propagate, which saves you from having to buy a jillion plants. If you plan to propagate your succulents, you will want to start that process a few days in advance, so the cuttings have time to callous over.
We bought our succulents from the Olbrich Botanical Gardens annual plant sale and from Jung’s here in Madison. Whenever possible, we like to support local nurseries and growers.
Step 2: Building the Vertical Planting Box
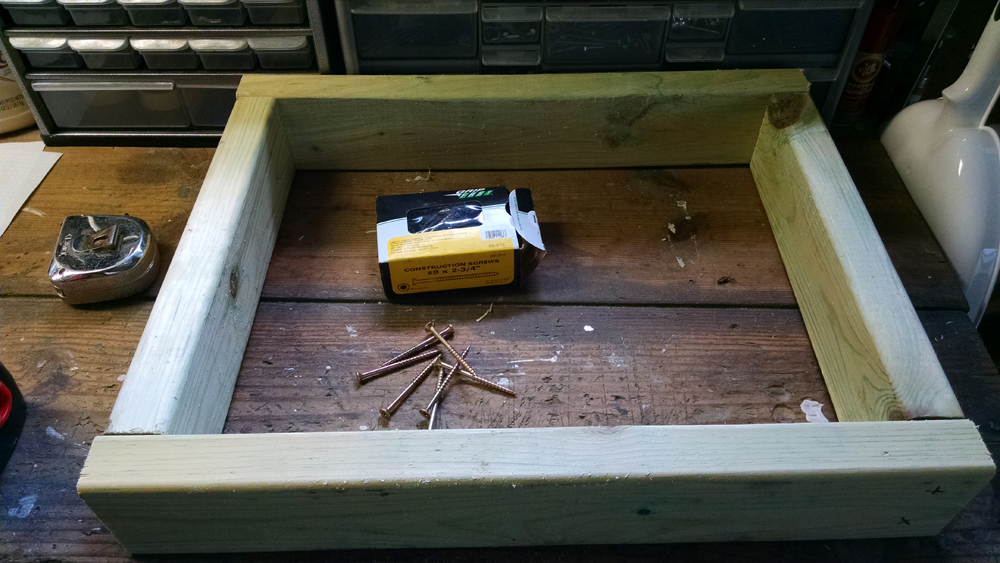
Measure and cut the 2×4’s to create the inner frame.
Building the box is the most time consuming part of the process. You can also buy premade hanging planting boxes, but around here, we always like to do it ourselves! Smaller boxes are a bit easier to make and will weigh less, so that might be better for indoor hanging gardens.
Measure the 2×4’s carefully. The beauty of making your own wall planting box is that you can make any size you want that fits your space. We just used scrap pieces of lumber we had lying around for the inner frame. Make sure you use treated lumber so it doesn’t rot after time.
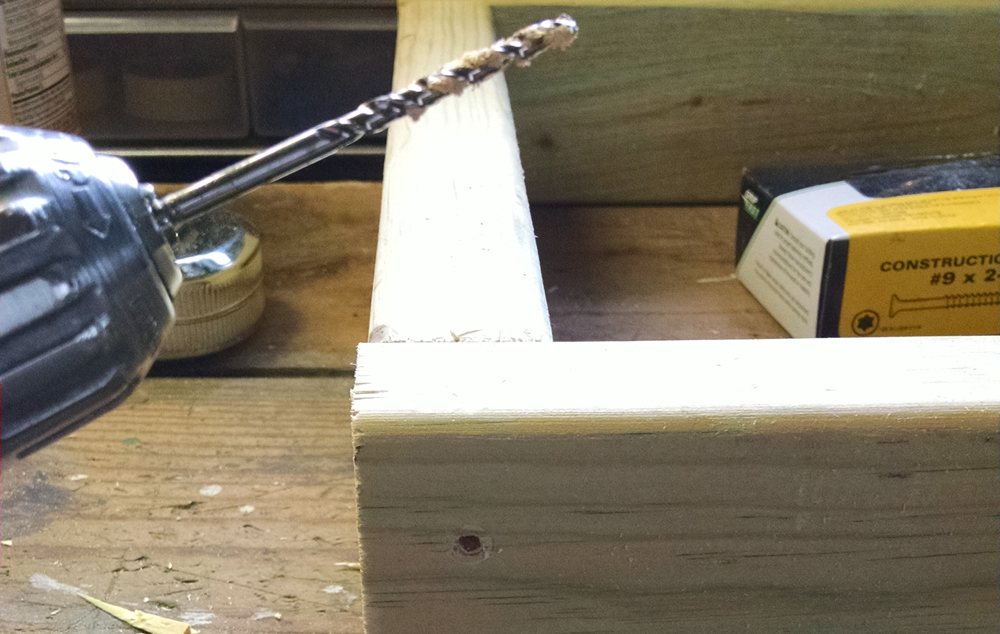
Predrilling your holes for this project will make it a lot easier.
Put at least two large screws in each side. You may also want to reinforce the joints with brackets.
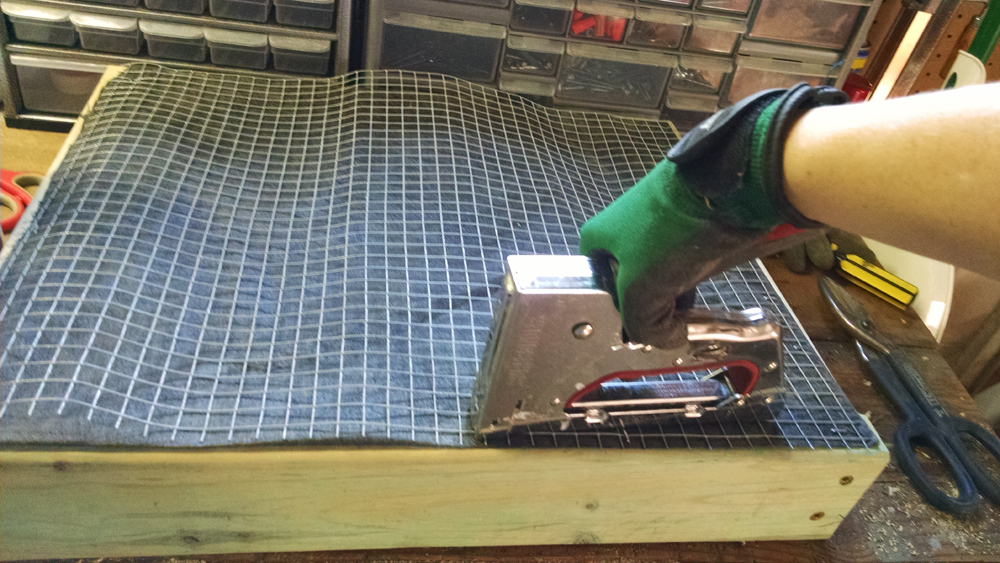
Staple the landscape fabric and then the wire to the bottom of the planting box.
For the back panel, measure and cut the hardware cloth and landscape fabric about a 1/4 inch inside the frame to leave room for stapling. In this case, we secured the corners of the landscape cloth first to make sure it was pulled tight and then stapled both the landscape fabric and the hardware cloth around the edges. It’s a good idea to wear gloves when you are cutting the hardware cloth as there will be some sharp edges. (Why it is called “cloth” I couldn’t tell you as there is not a lot about this wire that is cloth-like.)
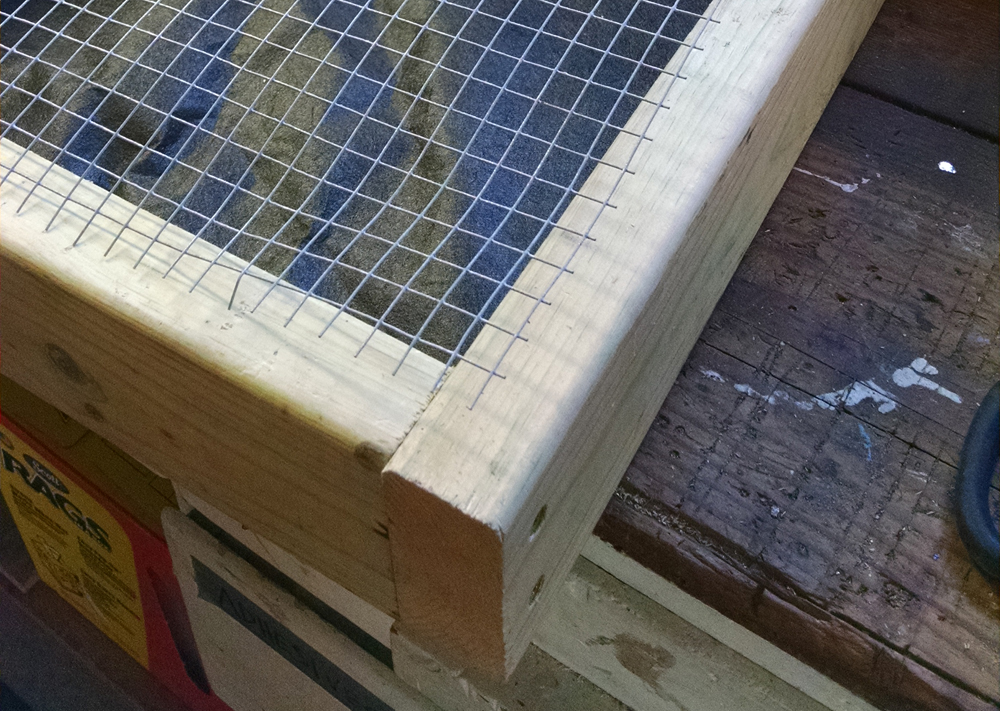
Thoroughly staple the wire on the top side of the garden box.
For the front side of the inner frame, measure and cut another piece of hardware cloth and secure it with staples.
For a little extra pizzazz, we decided to paint our inner frame lime green. One can never have too much lime green in my opinion, especially on the deck, which is where this vertical succulent garden will live. It’s best to do the painting before securing the outer frame, and you can let it dry while you work on the outer frame construction.
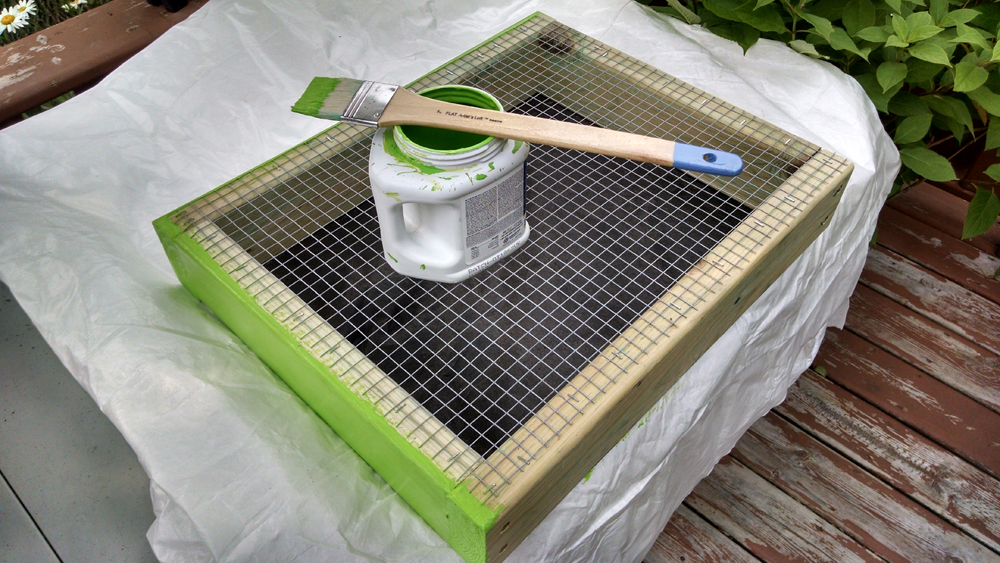
Painting the vertical garden planter.
Step 3: Making The Outer Frame
You can buy a pre-made frame to put on top of the gardening box, but we made one out of reclaimed wood.
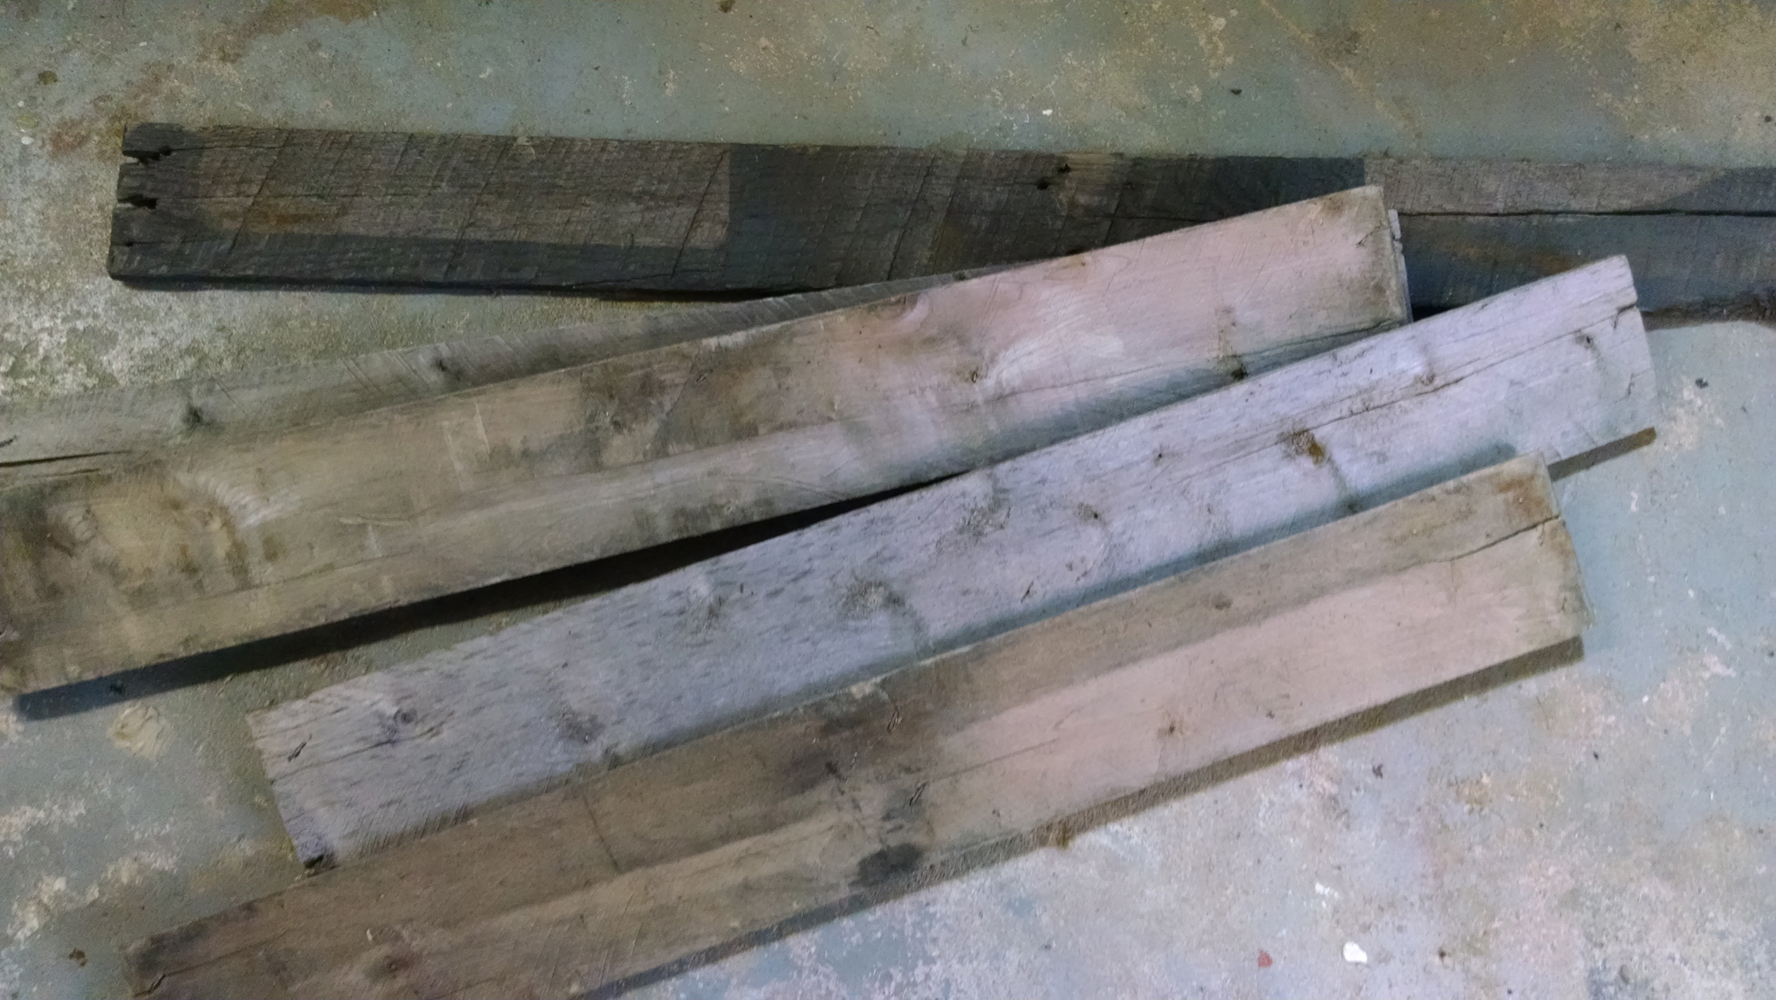
Where do you get reclaimed wood? We pried these boards from an old wooden palette we found in the alley.
Measure and cut the reclaimed boards to fit together like a picture frame, overlapping the boards slightly. Make sure to remove any staples or old nails that are in the boards before cutting.
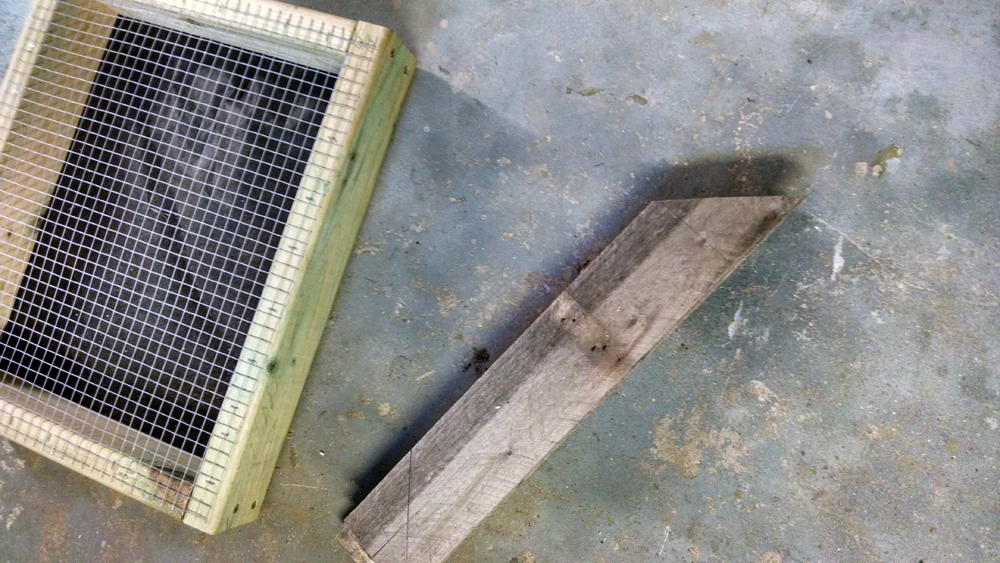
Cut 45 degree angles on both ends of the reclaimed wood.
You can use glue and brackets to hold the boards together if you want, but we are also going to nail them right into the inner frame. The outside frame is mostly for decoration, so it doesn’t need to be quite as sturdy as the inner frame.
Glue the reclaimed wood picture frame and let it dry.
Step 4: Prepare the Cactus / Succulent Soil Mixture
You can buy special cactus / succulent soil or make your own, which is a bit cheaper. The soil mixture is extremely important for good drainage, so be sure you do this step. The cactus soil mix is 4 parts potting soil, 2 parts sand and 1 part perlite. You can use most regular potting soils or peat moss, but make sure it is a light one with good drainage (it shouldn’t contain the absorptive vermiculite element). We roughly measured this and mixed it in a bucket.
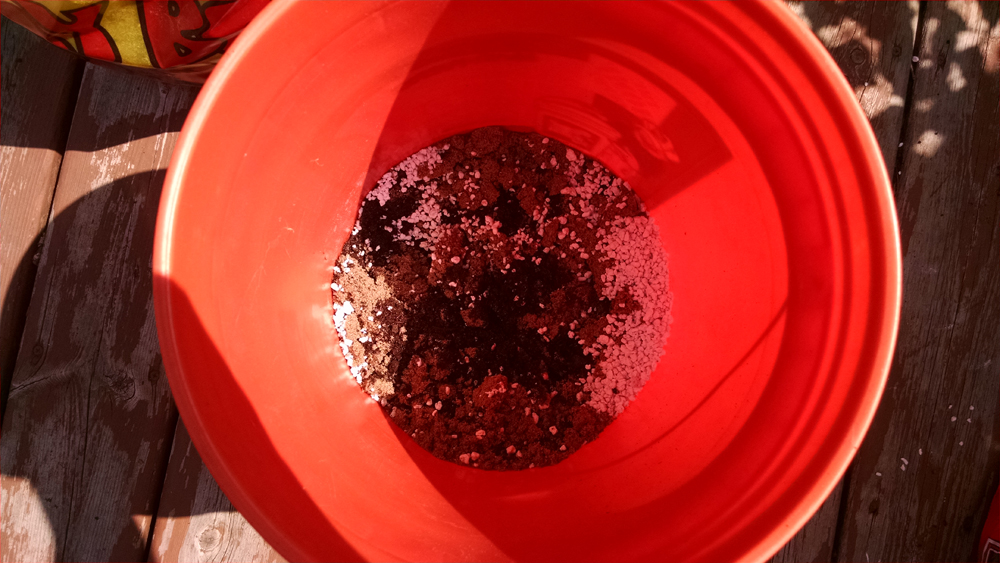
The cactus / succulent soil mix is 4 parts potting soil, 2 parts sand and 1 part perlite.
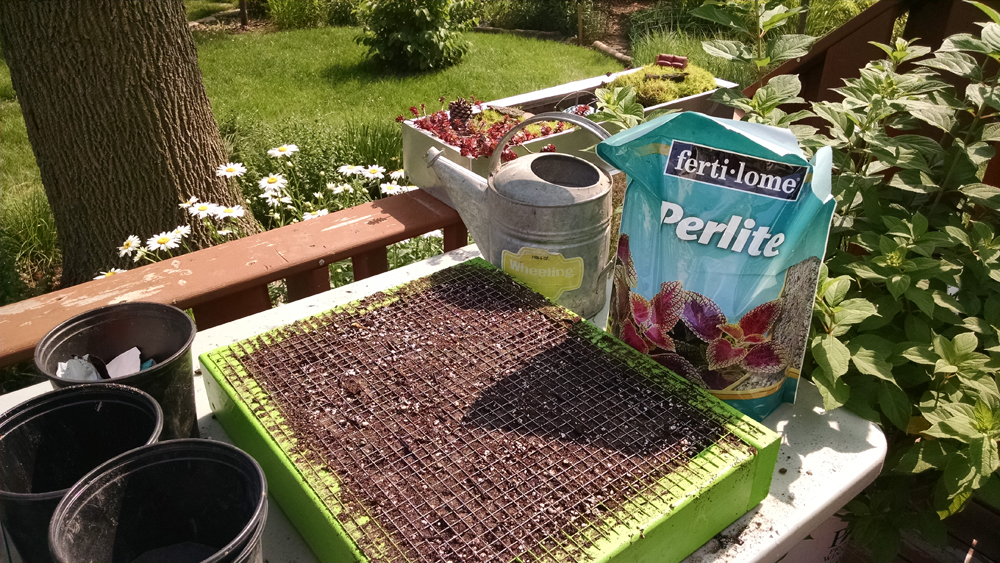
Fill the garden box with the soil mix, then pour water all over it. Let it settle for about 15 minutes, then fill it a little more with soil. You want the soil to fill the planter all the way to the hardware cloth.
The box is filled with soil.
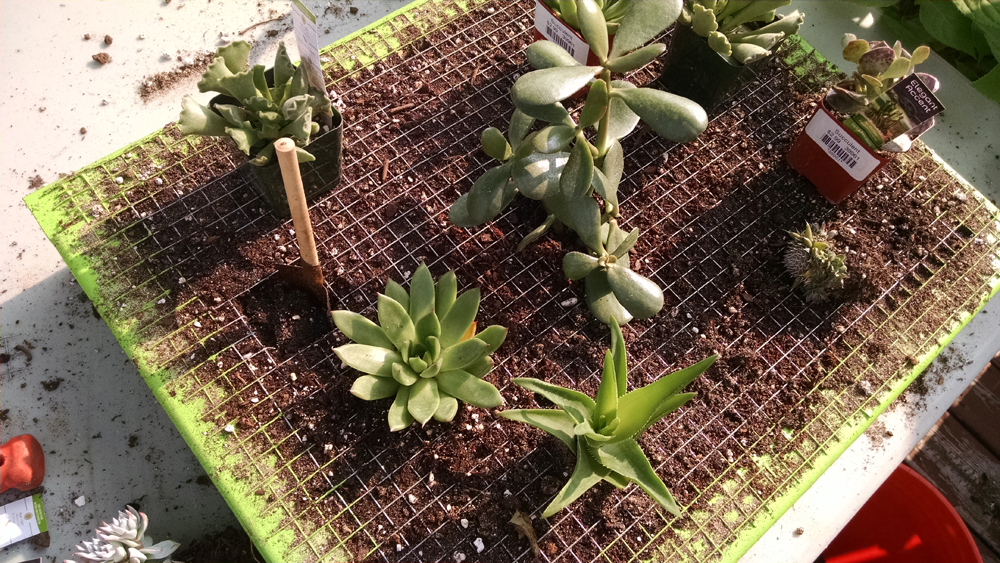
Step 5: Adding the Succulent Plants
Now that the box and the soil are ready, we get to work on the really fun part! We recommend putting the outer frame in place while laying out your plants so you know exactly where each is going to go. You can mark them with a marker or just leave them in place until you are ready to cut. Make sure you don’t cut too much of the wire away. Cut just enough to fit the roots in. Also, make sure to leave at least a couple of squares of wire intact between each plant and around the edges as this is what will be holding the plants from falling out. For most of our plants, cutting a 4×4 section from the hardware cloth was the perfect size.
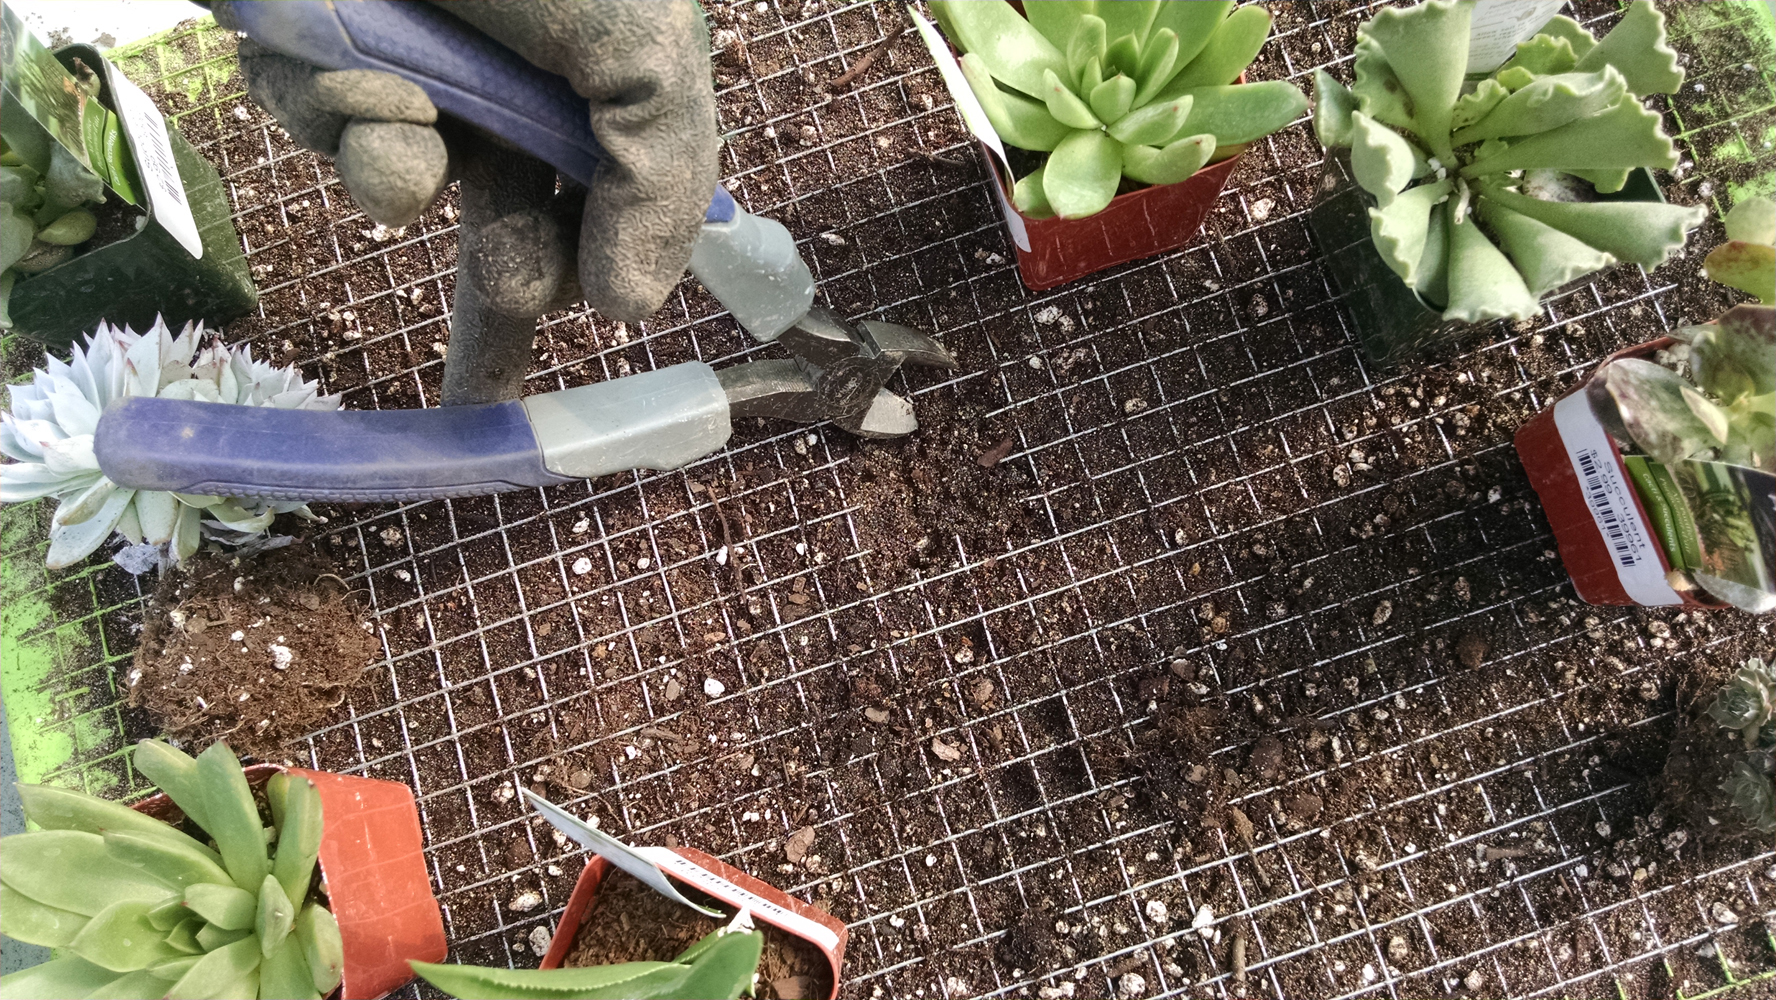
Snipping the wire to make room for the plants.
Bend the wire in around where you cut and remove the soil. It’s handy to have a spoon (or in my case a tiny decorative shovel!) to dig out the soil in the space.
Digging a tiny hole for the succulent plants.
If you are using succulent cuttings or tiny plants you have propagated, you may not even want to cut any of the hardware cloth but rather just poke a hole in the soil using a pencil or large screw.
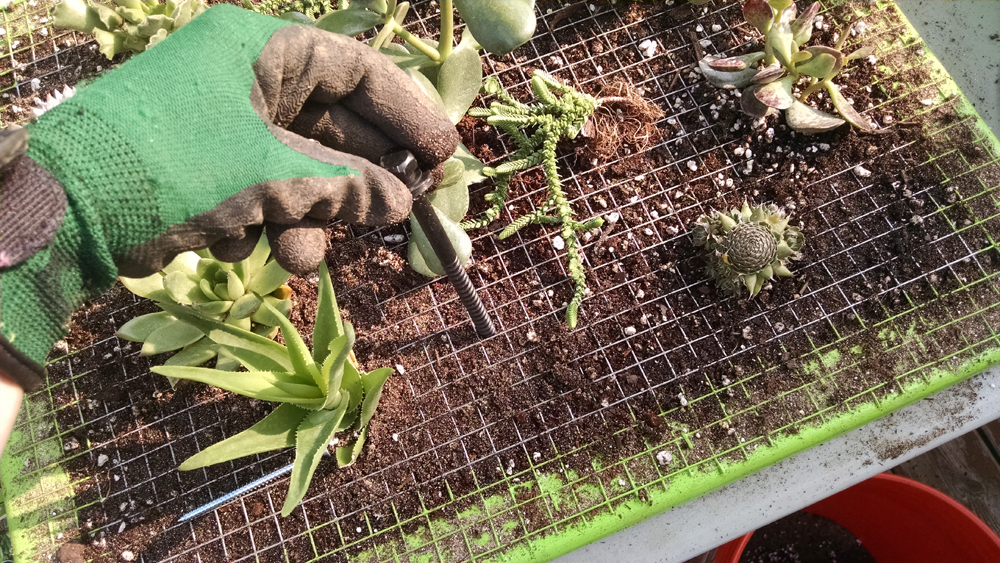
Using a nail or screw to make a hole in the soil for the plant roots.
Once you have all of your big plants in, it’s time to clean up this mess a bit.
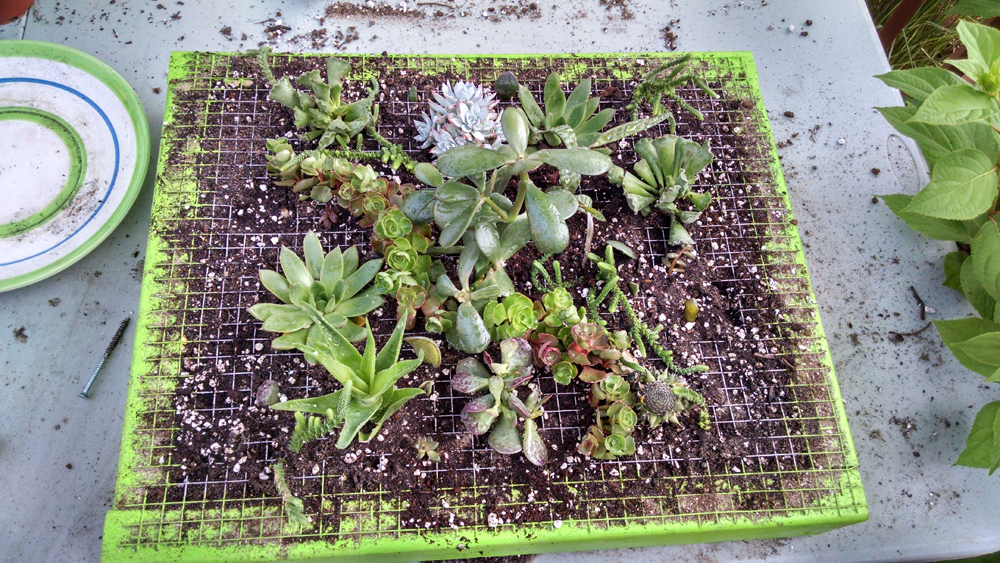
Planting the vertical succulent garden
Step 6: Attaching the Outer Picture Frame
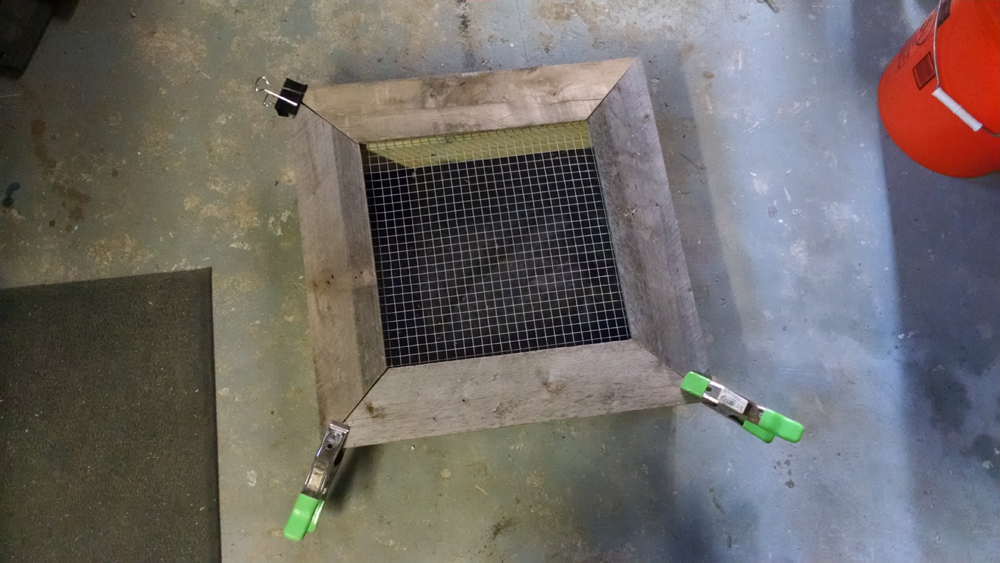
If you are using reclaimed wood, it is important to predrill your holes as this wood is thin and fragile. Any pounding or nailing could result in cracks or breakage. Then you can screw or nail the outer frame directly into the inner frame. We used clamps to hold the frame together during this step to make sure the corners would stick together during all the pounding.
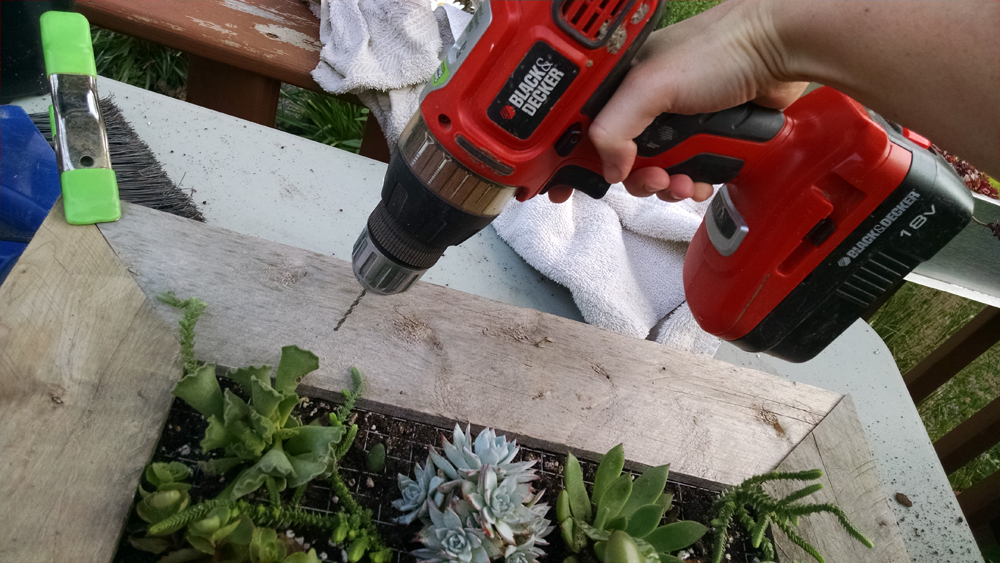
Predrilling holes in the reclaimed wood
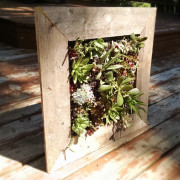
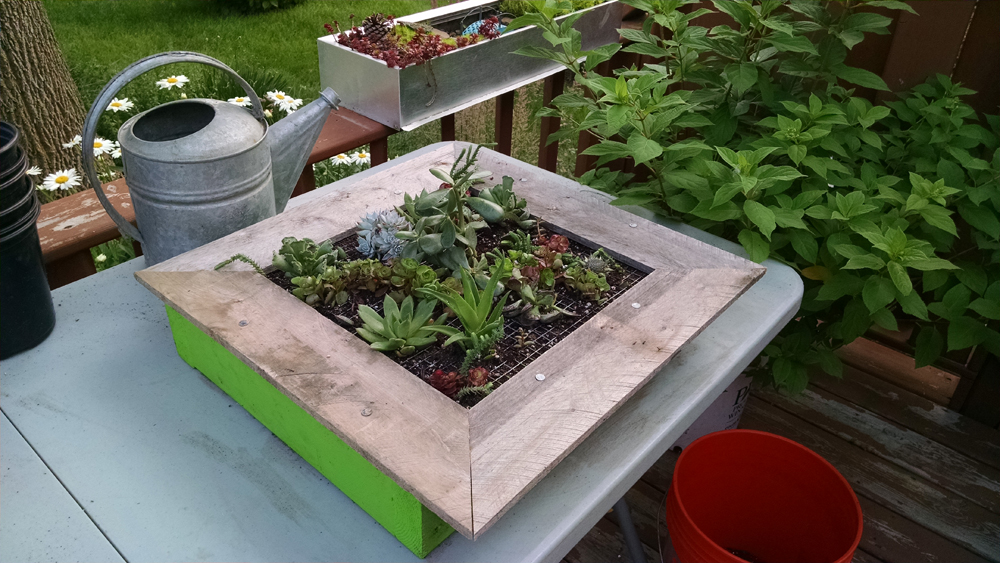
Voila! The frame is attached and we are nearly done! In my case, I had a few cuttings of sedum from our yard that I filled out the planting box with. I did leave some room for the plants to fill in on their own, but you can really pack it full if you have enough plants. Once you’re done planting, give it some water. But in general, be sure not to over-water your succulents.
How to make a vertical succulent garden in a picture frame
If you use tiny plants or cuttings, you’ll want to leave your succulent planting box sitting there for a number of days (maybe even a couple of weeks) in order to let the plants root in so they don’t fall out when you tip this on its side.
Step 7: Hanging the Vertical Succulent Garden
Depending on where you are hanging this (inside versus outside, solid wall versus a fence), you may have a different configuration for hanging your succulent garden. But above all, you want to make sure you use high quality, sturdy materials. These things are super heavy when you get all the soil and plants in them, so get some strong brackets and hooks.
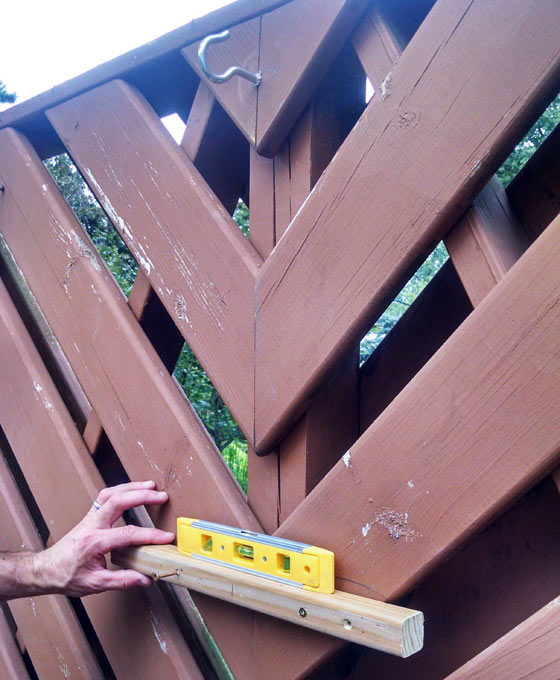
We used one center hook and also reinforced the bottom with a 2×2 cross beam for extra support. Take the time to make sure the crossbeam is level.
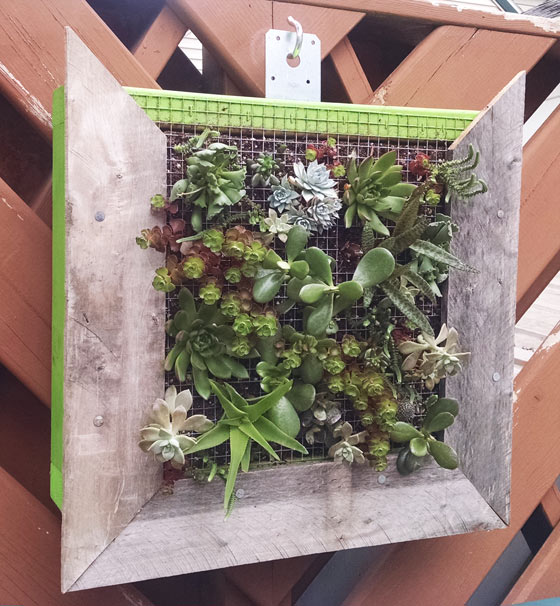
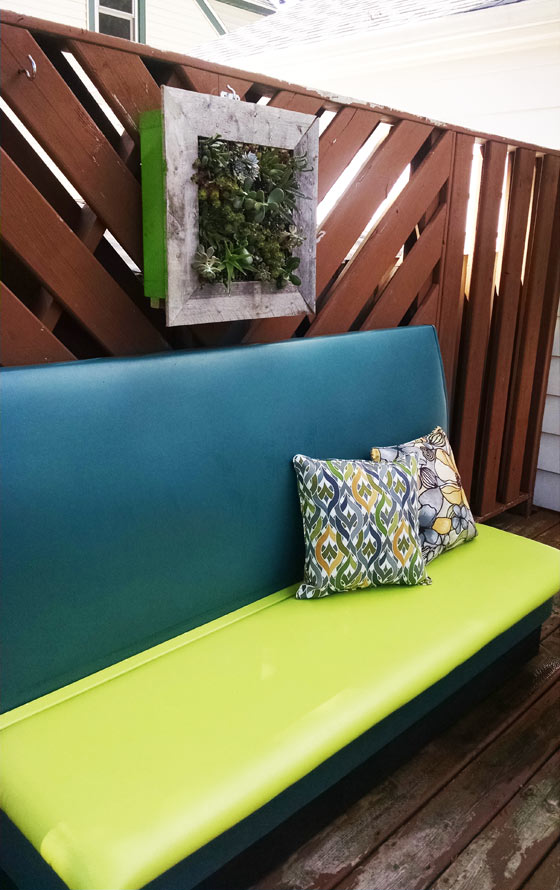
Our succulent picture hanging from a steel bracket and hook.
Step 8: Care and Maintenance
Hooray, you are done with your beautiful new garden! Once your living wall or picture frame is hung, it’s time to step back and enjoy it! You need to water your succulents per their instructions. We like using a water bottle so as not to over water the plants. In order to prevent root rot, don’t water your succulent garden until the soil is totally dried out. We live in Madison, Wisconsin, so we’ve got pretty cold winters. Our garden would likely not survive a winter, so we’ll be bringing it inside for the winter.
Thanks for reading and let us know how your succulent garden is growing!