backyard composting tips

Tips for Backyard Composting

Backyard composting is an excellent way to limit off-site disposal of  your yard and kitchen waste, while creating a nourishing soil additive for your gardens. Adding compost to your garden will promote soil health, improve soil drainage and structure,  loosen heavy soils, and suppress soil-borne plan diseases. Compost adds crucial micro-organisms, bacteria, and fungi threads for a more productive, healthy soil.

How to avoid a smelly compost pile

A properly tended compost pile won’t create unpleasant smells. By maintaining levels of air (oxygen) levels, moisture, and temperature, you can have a productive compost pile that will not offend your neighbors with any troubling smells.

The single most important tip in avoiding a stinky compost pile is making sure you have the correct ratio of “green matter” and “brown matter”.

Green matter includes such items as fruit and vegetable scraps, coffee grounds, and grass clippings. These items are high in nitrogen and decay very quickly.  Brown matter includes leaves, straw, used coffee filters, and sawdust. This items are high in carbon and decay more slowly.  An ideal ratio for composting is 1/3 greens to 2/3 browns.

Composting is the environmentally-friendly way to dispose of your food scraps and garden debris. According to the Wisconsin Department of Natural Resources, each year over 300,000 tons of yard materials is composted, saving all that waste from going to landfills and incinerators in Wisconsin.

Typically, composting does not require a licence or approval, as long as they are maintained in a nuisance-free manner. Always check with your local community ordinances to see if there are any backyard composting regulations. DO NOT compost foods such as meat, bones, dairy products or oils. These types of materials will attract animals and other unwanted pests.

If you need help creating or managing a compost pile in your backyard, contact Sprout Landscape & Garden today! We can help!

Edible Garden

Our Southern Wisconsin Red Raspberry Garden: Establishing a New Patch

Edible Garden

Autumn Britten Red Raspberries

Having your own raspberry patch can be very rewarding and a fun addition to your landscape. In order to establish and maintain a productive patch, there are important plant selection, siting, and care factors to consider.

To start, you’ll need to decide which type of raspberry you will grow. Raspberry fruit types can be categorized by either summer bearing or fall-bearing (called ever-bearing by some). Summer-bearing will produce one large crop during mid-late summer. Fall-bearing varieties will produce a large crop in the fall, as well as a small crop the following summer. Fall-bearing raspberries will generally grow best in the lower two-thirds of Wisconsin where the growing season is longer. In colder climates, an early frost may ruin a late-fall crop before it is fully developed.

Year 1: Getting Started

Our garden started after I received six Autumn Britten (fall-bearing) red raspberry transplants from a friend in late spring of 2012. This is an excellent cultivar because of its high yield, delicious fruit, and cold hardiness. And because it’s an early fall-bearer, we could plan on maximizing our harvest well before the first heavy frost.

We chose a sunny, well-drained location, amended the existing topsoil with compost, then installed the plants using adequate spacing (approx. 24” on center) to promote air circulation and allow future growth. A path around the patch provided access to maintain the plants and harvest the fruit, while preventing soil compaction within the patch. The path also provided an important buffer between the patch and the neighbors adjacent vegetable garden. This allowed us to easily recognize and remove any spreading growth trying to reach his garden and anything from his garden reaching toward our patch. We also installed a 24” high wire fence to protect the plants from our chickens, as well as help support longer canes along the perimeter of the patch.

Not surprising, the first year’s fruit production was sparse and sporadic. Our actual focus was not to push the plants for high fruit production, but rather focus on overall plant health and root development. We monitored watering, removed weeds, watched for pests, and continued to amend the soil. We used marsh hay during the summer to help moderate soil temperature, reduce soil moisture loss, prevent weed growth, and keep low-hanging fruit from contacting soil.

Because the plants were still thin going into winter, I did not cut them back, but cleaned out all leaves and old hay. To help insulate them for their first winter, I applied a layer of compost, followed by a layer of fresh hay. Any dead or wild growth was cut back early the following spring once we could access any winter die back.

Year 2: Harvesting Fruit & The Cane Borer: 

Even with an extremely cold winter, the young plants thrived in their second year and the fruit production was excellent. After starting to produce in early summer, the patch seemed to produce more and more as the season went on.

Though the second-year plants produced well this past summer, we did encounter our first pest: the raspberry cane borer. I had noticed occasional tips of the plants wilting, then dying off. Many of these stems included developing fruit. This was the result of the cane borer laying its eggs, which is done by creating a double row of punctures around the stem.

The cane borers will likely return to some degree this spring. To rid of the pests, I’ll be monitoring for the first sign of wilt, then immediately cutting the stem 5-6” below the punctures rings and disposing of the cuttings containing the eggs.

End-of-Season Expansion and Year 3 Planning:

At the end of this second year, I was given transplants of another fall-bearing cultivar called Heritage. This cultivar also develops excellent fruit, is very cold hardy, and produces upright, self-supporting canes. This prompted me to expand the current patch as well as make space for the new transplants and future strawberries.

First, I thinned and dug up the existing raspberry plants and re-spaced them to create a larger area now consisting of 9 Autumn Britten plants. For the new Heritage transplants, I mirrored our existing patch and followed the same steps as before to provide the conditions they require to thrive. And because this was November, I provided them winter protection right away.

This coming spring, we’ll be amending the soil once again for the new raspberries and future strawberry plants. Our goal is to create a berry garden that will not only produce edible fruit spring through fall, but also provide a yield large enough to enjoy throughout the entire year. My instincts are already telling me another expansion is likely:)

Madison landscape design

Garden Photo Favorites

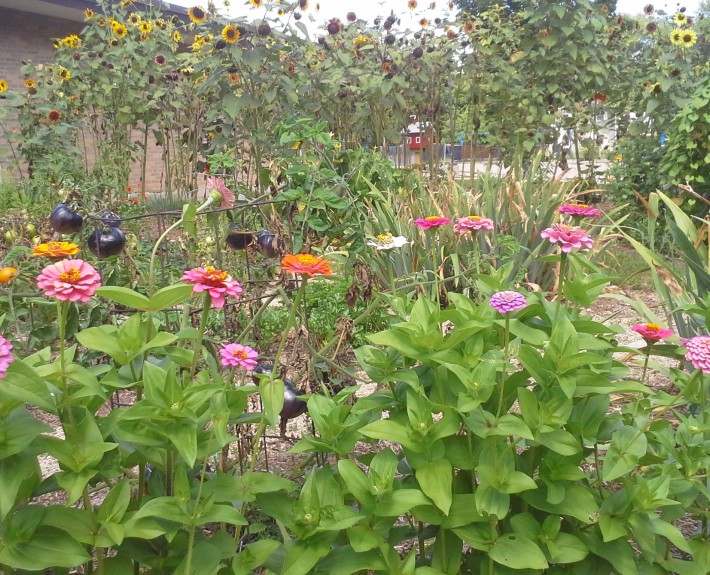
One of the most rewarding part of gardening is enjoying plants in their flowering stages. But even the fresh emerging spring growth, developing buds and fall color can provide some beautiful scenes. By including a variety of plants in your garden with varying flowering times, you can enjoy color throughout the entire season. From flowering spring bulbs and ephemerals to mid-summer cone flower to fall aster, there can always be something exciting happening in your garden. Here’s some of our favorite plant photos from this past season at our garden:

Madison landscape photo

Coneflower


Sustainable gardening

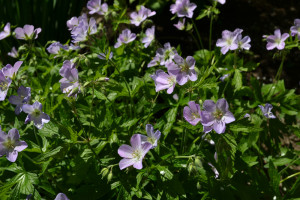
Wild Geranium

Madison rain harvesting

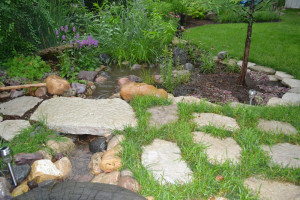
Rain Garden

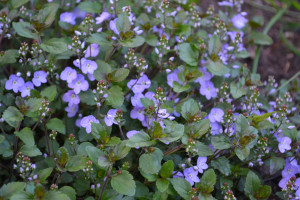
flowering groundcover

Waterperry Blue Veronica

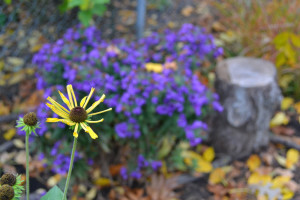
Yellow Coneflower

Little Henry Rudbeckia

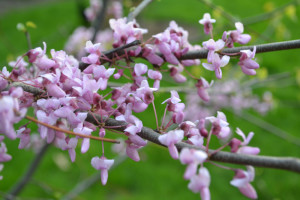
Redbud tree

Eastern Redbud

Vegetable garden

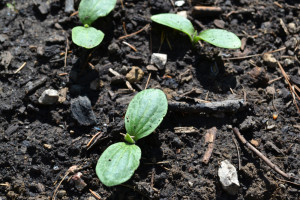
Garden Sprouts

Madison planting design

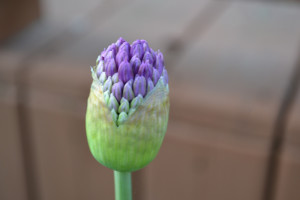
Summer Beauty Allium

Planting spring bulbs

Spring allium bulbs

Vegetable garden

Mexican Sunflower

Growing hops

Hops

Madison garden

Mini Garden

vertical succulent garden

How to Build a Vertical Succulent Garden

Building vertical gardens or “live walls” are all the rage. You’ve seen these on Pinterest and Better Homes & Gardens magazine, but have you actually seen one of these in real life? These living walls (also called living pictures) are an exciting way to decorate with plants indoors or outdoors, especially when you’re short on space. If you’re looking for a fun weekend gardening project, check out this tutorial on constructing your own vertical succulent garden with a custom hanging planter.

Step 1: Get Your Succulent Plants & Supplies

Supplies and tools needed are:

  • 2×4’s (best to get treated wood)
  • Galvanized hardware cloth
  • Galvanized nails or screws
  • Staple gun / staples
  • A drill
  • A hammer
  • Wire cutters
  • Gloves
  • Garden / landscape fabric
  • A miter saw
  • Paint / paintbrush (optional)
  • Scrap wood, reclaimed wood or an old picture frame (optional)
  • Cactus Potting Soil (see below for mixing your own)
  • Various Succulent Plants
  • Steel hooks with brackets for hanging
Succulent plants for drought-tolerant garden

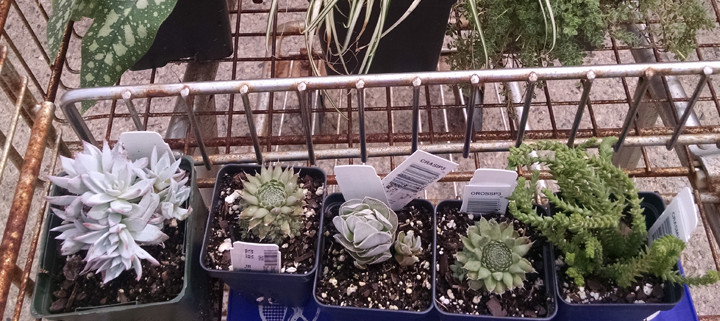
Succulent plants bought in Madison for drought-tolerant succulent wall planter.

Succulents are great plants for this project because they are beautiful, low maintenance and need very little water. They are also easy to propagate, which saves you from having to buy a jillion plants. If you plan to propagate your succulents, you will want to start that process a few days in advance, so the cuttings have time to callous over.

We bought our succulents from the Olbrich Botanical Gardens annual plant sale and from Jung’s here in Madison. Whenever possible, we like to support local nurseries and growers.

http://www.jungseed.com

http://www.olbrich.org


Step 2: Building the Vertical Planting Box

Measure and cut the 2x4's to create the inner frame.

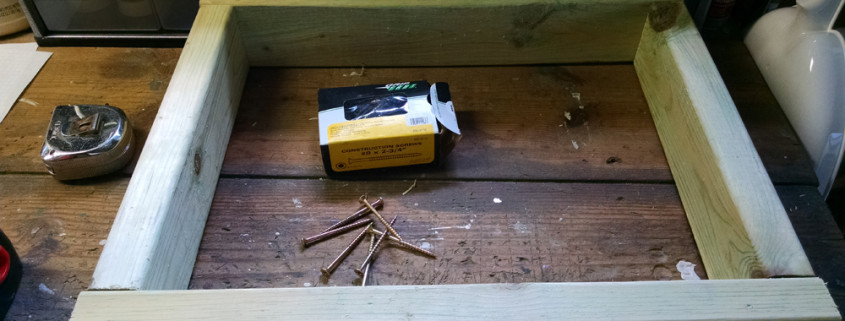
Measure and cut the 2×4’s to create the inner frame.

Building the box is the most time consuming part of the process. You can also buy premade hanging planting boxes, but around here, we always like to do it ourselves! Smaller boxes are a bit easier to make and will weigh less, so that might be better for indoor hanging gardens.

Measure the 2×4’s carefully. The beauty of making your own wall planting box is that you can make any size you want that fits your space. We just used scrap pieces of lumber we had lying around for the inner frame. Make sure you use treated lumber so it doesn’t rot after time.
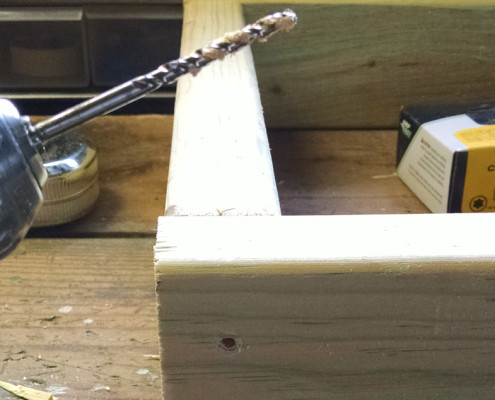
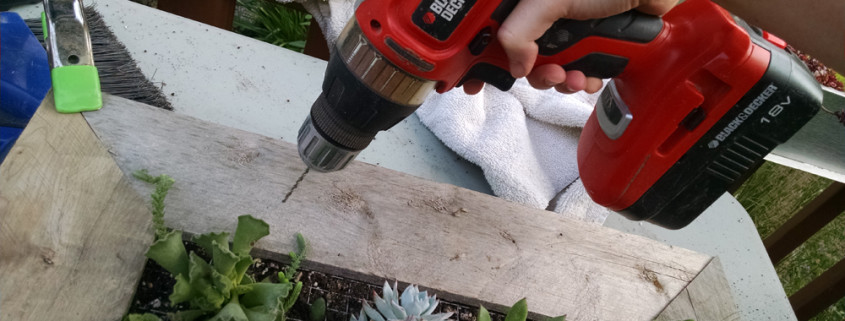
Predrilling your holes for this project will make it a lot easier.

Predrilling your holes for this project will make it a lot easier.

Put at least two large screws in each side. You may also want to reinforce the joints with brackets.

Staple the landscape fabric and then the wire to the bottom of the planting box.

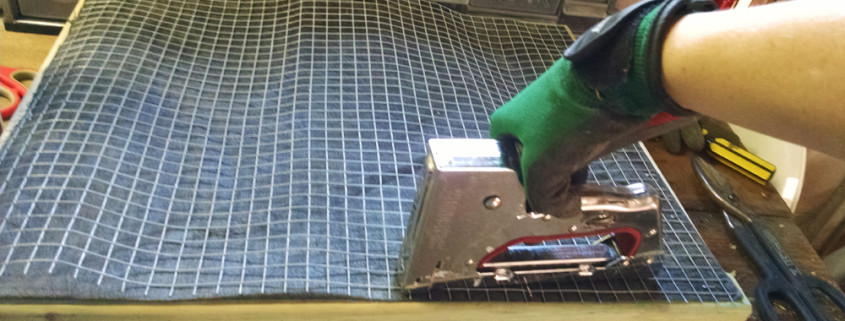
Staple the landscape fabric and then the wire to the bottom of the planting box.

For the back panel, measure and cut the hardware cloth and landscape fabric about a 1/4 inch inside the frame to leave room for stapling. In this case, we secured the corners of the landscape cloth first to make sure it was pulled tight and then stapled both the landscape fabric and the hardware cloth around the edges. It’s a good idea to wear gloves when you are cutting the hardware cloth as there will be some sharp edges.  (Why it is called “cloth” I couldn’t tell you as there is not a lot about this wire that is cloth-like.)

Staple the wire on the top side of the garden box.

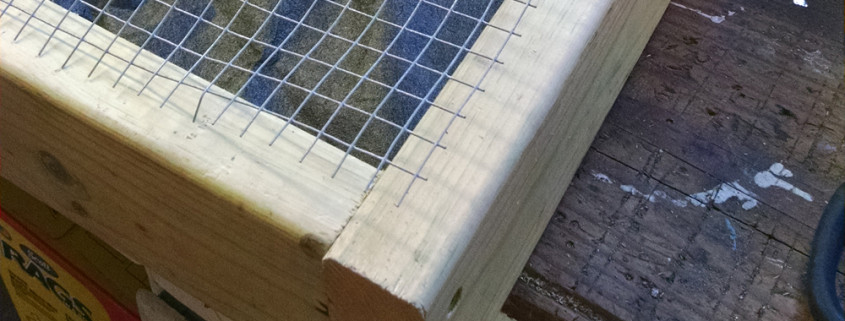
Thoroughly staple the wire on the top side of the garden box.

For the front side of the inner frame, measure and cut another piece of hardware cloth and secure it with staples.

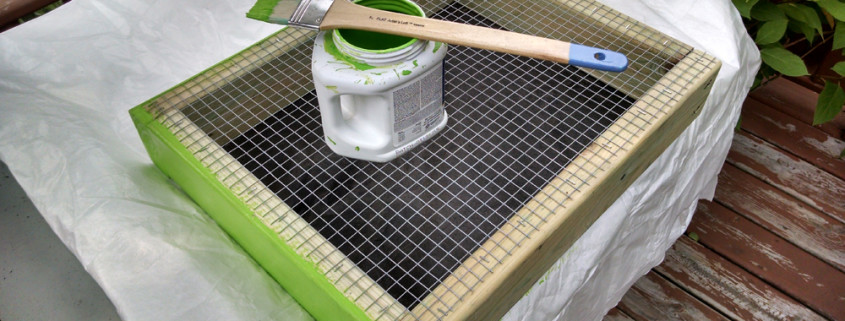
For a little extra pizzazz, we decided to paint our inner frame lime green. One can never have too much lime green in my opinion, especially on the deck, which is where this vertical succulent garden will live. It’s best to do the painting before securing the outer frame, and you can let it dry while you work on the outer frame construction.

Painting the vertical garden box

Painting the vertical garden planter.

Step 3: Making The Outer Frame

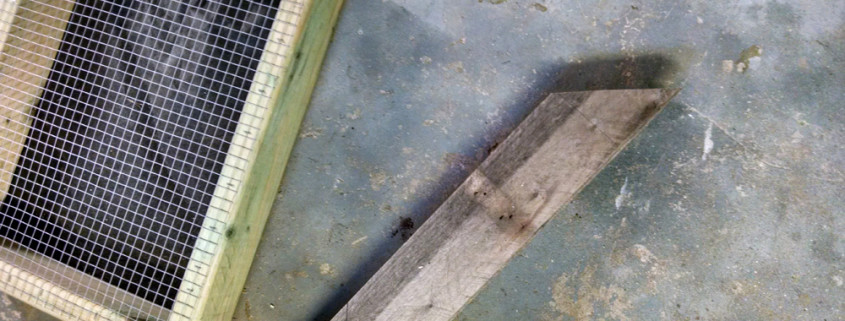
You can buy a pre-made frame to put on top of the gardening box, but we made one out of reclaimed wood.
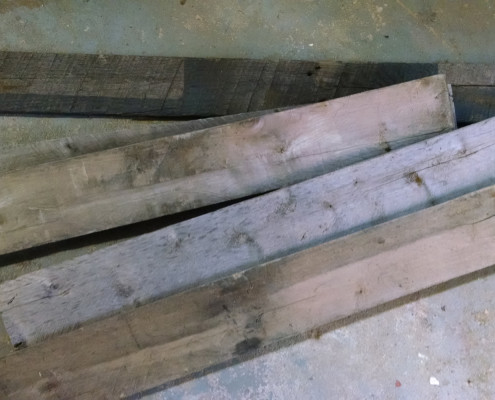
Where do you get reclaimed wood? We pried these boards from a wooden palette we found in the alley.

Where do you get reclaimed wood? We pried these boards from an old wooden palette we found in the alley.

Measure and cut the reclaimed boards to fit together like a picture frame, overlapping the boards slightly. Make sure to remove any staples or old nails that are in the boards before cutting.

Cut 45 degree angles on both sides of the reclaimed wood.

Cut 45 degree angles on both ends of the reclaimed wood.

You can use glue and brackets to hold the boards together if you want, but we are also going to nail them right into the inner frame. The outside frame is mostly for decoration, so it doesn’t need to be quite as sturdy as the inner frame.
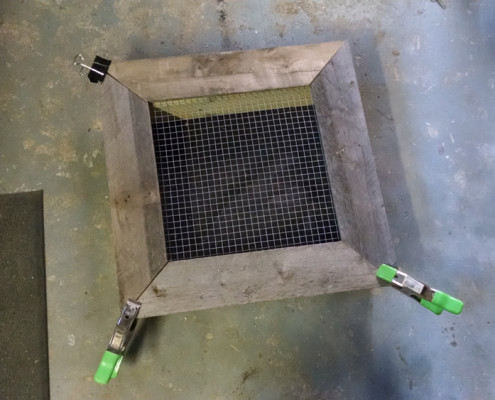
Glue the reclaimed wood picture frame and let it dry.

Glue the reclaimed wood picture frame and let it dry.


Step 4: Prepare the Cactus / Succulent Soil Mixture

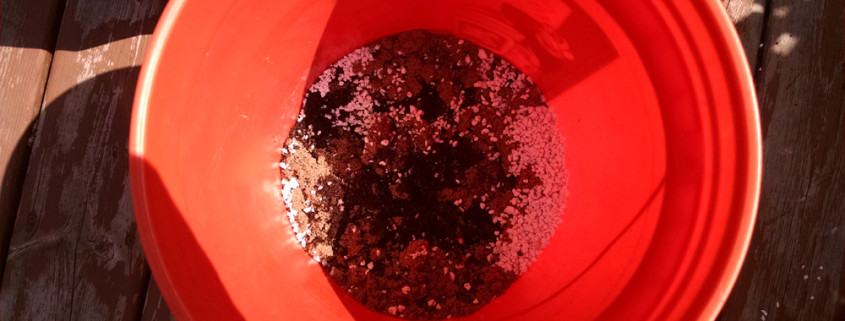
You can buy special cactus / succulent soil or make your own, which is a bit cheaper. The soil mixture is extremely important for good drainage, so be sure you do this step. The cactus soil mix is 4 parts potting soil, 2 parts sand and 1 part perlite. You can use most regular potting soils or peat moss, but make sure it is a light one with good drainage (it shouldn’t contain the absorptive vermiculite element). We roughly measured this and mixed it in a bucket.

The cactus soil mix is 3 parts potting soil, 2 parts sand and 1 part perlite.

The cactus / succulent soil mix is 4 parts potting soil, 2 parts sand and 1 part perlite.

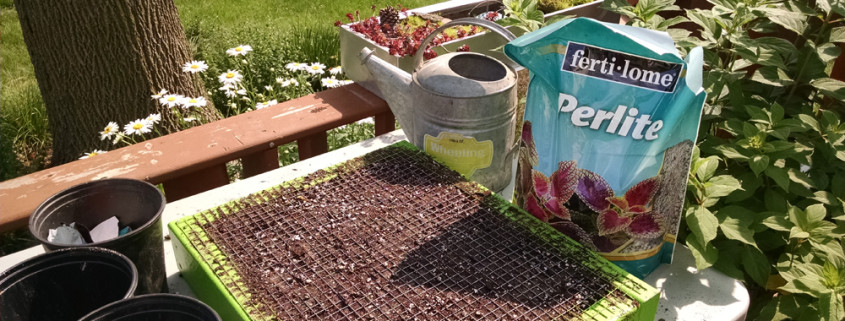
Fill the garden box with the soil mix, then pour water all over it. Let it settle for about 15 minutes, then fill it a little more with soil. You want the soil to fill the planter all the way to the hardware cloth.

The box is filled with soil.

The box is filled with soil.

 Step 5: Adding the Succulent Plants

Now that the box and the soil are ready, we get to work on the really fun part! We recommend putting the outer frame in place while laying out your plants so you know exactly where each is going to go. You can mark them with a marker or just leave them in place until you are ready to cut. Make sure you don’t cut too much of the wire away. Cut just enough to fit the roots in. Also, make sure to leave at least a couple of squares of wire intact between each plant and around the edges as this is what will be holding the plants from falling out. For most of our plants, cutting a 4×4 section from the hardware cloth was the perfect size.
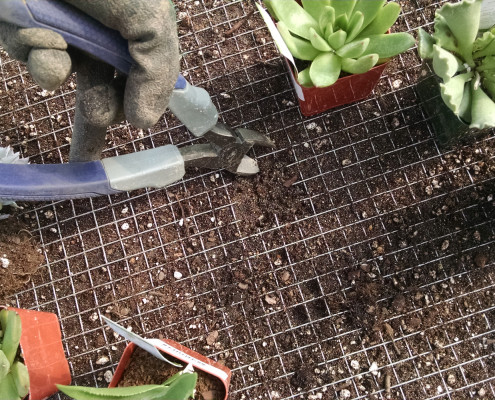
Snipping the wire to make room for the plants.

Snipping the wire to make room for the plants.

Bend the wire in around where you cut and remove the soil. It’s handy to have a spoon (or in my case a tiny decorative shovel!) to dig out the soil in the space.
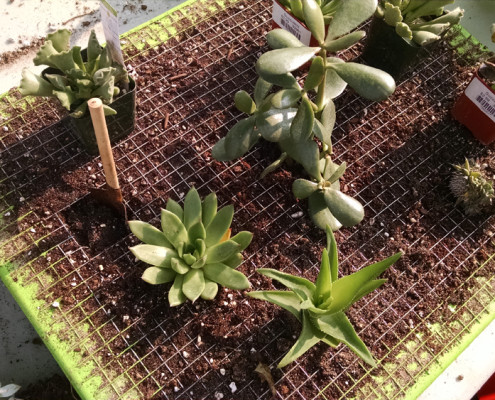
Digging a tiny hole for the succulent plants.

Digging a tiny hole for the succulent plants.

If you are using succulent cuttings or tiny plants you have propagated, you may not even want to cut any of the hardware cloth but rather just poke a hole in the soil using a pencil or large screw.
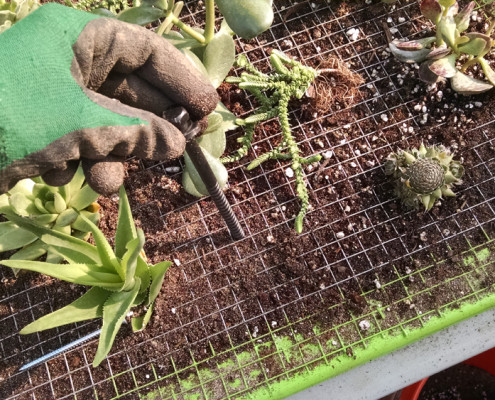
Using a nail or screw to make a hole in the soil for the plant roots.

Using a nail or screw to make a hole in the soil for the plant roots.

Once you have all of your big plants in, it’s time to clean up this mess a bit.
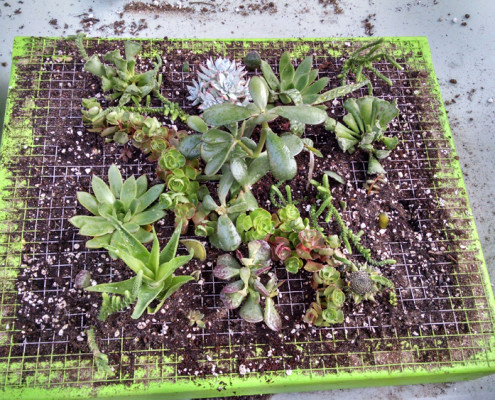
Planting the vertical succulent garden

Planting the vertical succulent garden

 Step 6: Attaching the Outer Picture Frame

If you are using reclaimed wood, it is important to predrill your holes as this wood is thin and fragile. Any pounding or nailing could result in cracks or breakage. Then you can screw or nail the outer frame directly into the inner frame. We used clamps to hold the frame together during this step to make sure the corners would stick together during all the pounding.

Predrilling holes in the reclaimed wood

Predrilling holes in the reclaimed wood

Voila! The frame is attached and we are nearly done! In my case, I had a few cuttings of sedum from our yard that I filled out the planting box with. I did leave some room for the plants to fill in on their own, but you can really pack it full if you have enough plants. Once you’re done planting, give it some water. But in general, be sure not to over-water your succulents.
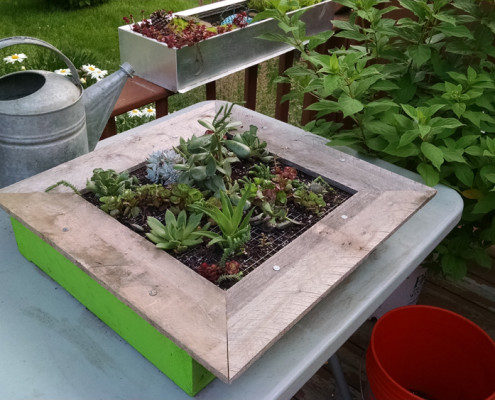
How to make a vertical succulent garden in a picture frame

How to make a vertical succulent garden in a picture frame

If you use tiny plants or cuttings, you’ll want to leave your succulent planting box sitting there for a number of days (maybe even a couple of weeks) in order to let the plants root in so they don’t fall out when you tip this on its side.

Step 7: Hanging the Vertical Succulent Garden

Depending on where you are hanging this (inside versus outside, solid wall versus a fence), you may have a different configuration for hanging your succulent garden. But above all, you want to make sure you use high quality, sturdy materials. These things are super heavy when you get all the soil and plants in them, so get some strong brackets and hooks.
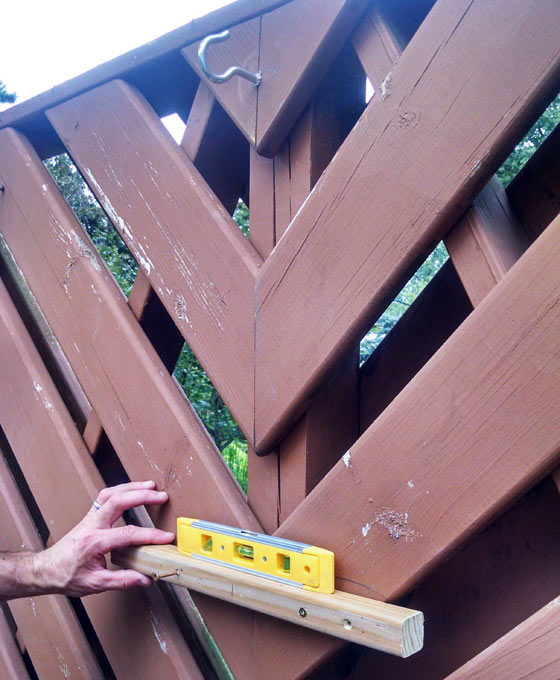
How to Hang a Succulent Garden

We used one center hook and also reinforced the bottom with a 2×2 cross beam for extra support. Take the time to make sure the crossbeam is level.
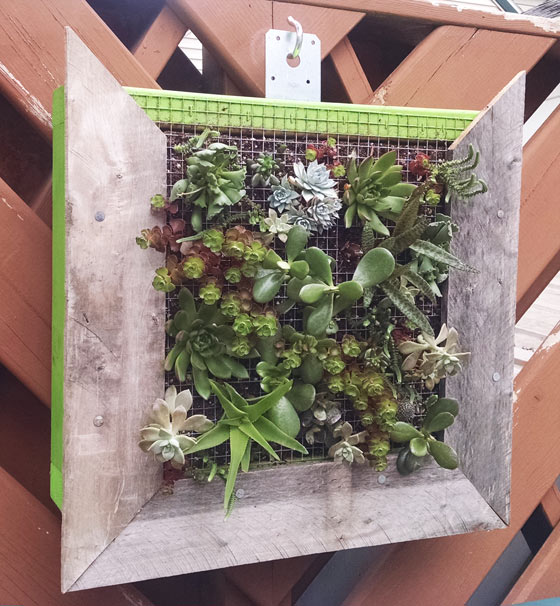


Our succulent picture hanging from a steel bracket and hook.

Our succulent picture hanging from a steel bracket and hook.


Step 8: Care and Maintenance

Hooray, you are done with your beautiful new garden! Once your living wall or picture frame is hung, it’s time to step back and enjoy it! You need to water your succulents per their instructions. We like using a water bottle so as not to over water the plants. In order to prevent root rot, don’t water your succulent garden until the soil is totally dried out. We live in Madison, Wisconsin, so we’ve got pretty cold winters. Our garden would likely not survive a winter, so we’ll be bringing it inside for the winter.
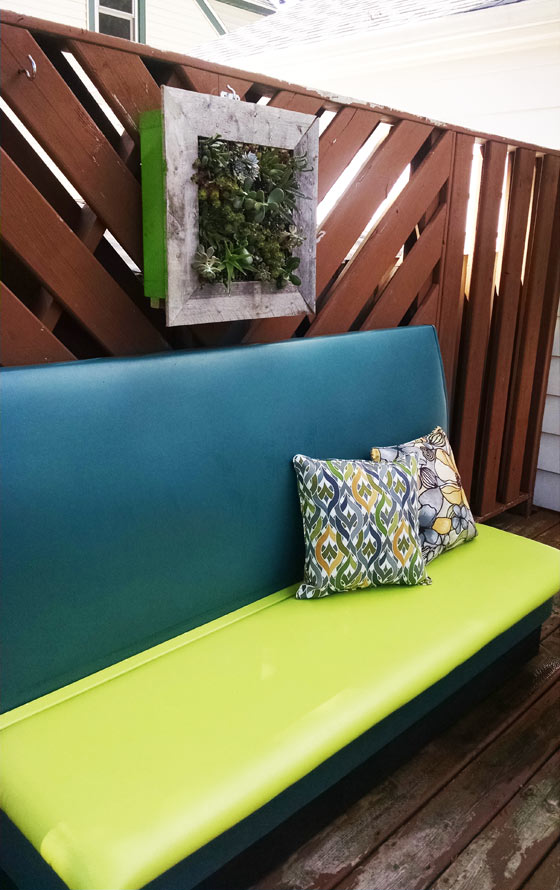
IMG_20150809_143217643


Thanks for reading and let us know how your succulent garden is growing!

Miniature Gardening & Tiny Landcapes

How to make a mini garden for less than $10:

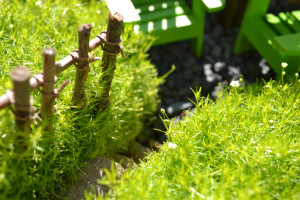
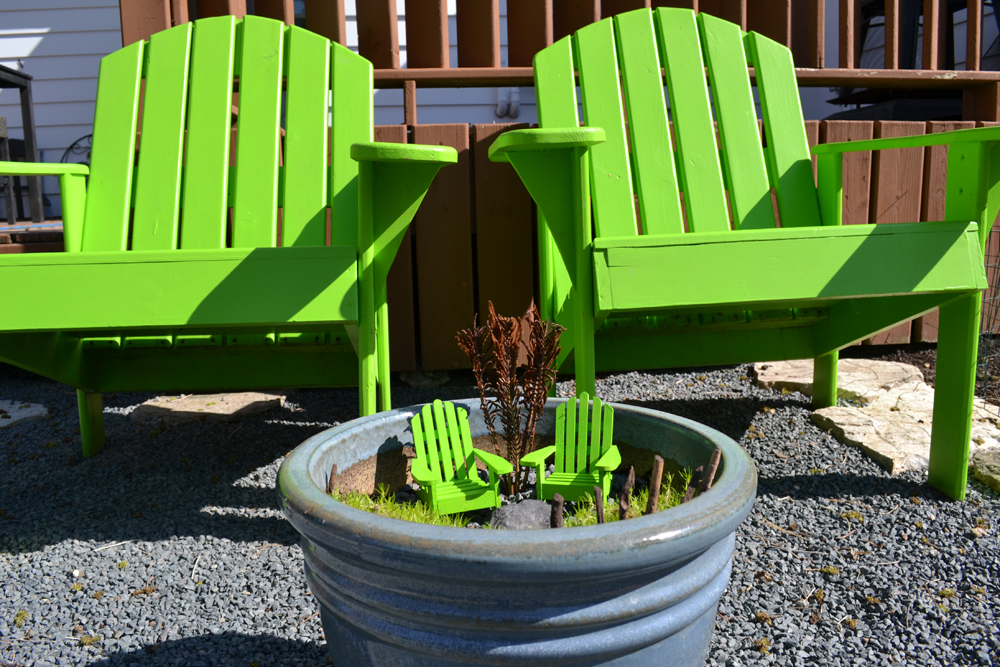
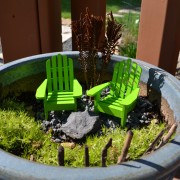
Who doesn’t love a miniature garden? At Sprout Landscape & Garden, we’re working on a series of mini landscapes for our own yard, including this replica of our blue stone patio with lime green adirondack chairs!

DSC_0483

Stay tuned for more pictures. We’ll be working on a miniature chicken coop and mini retaining walls.DSC_0479

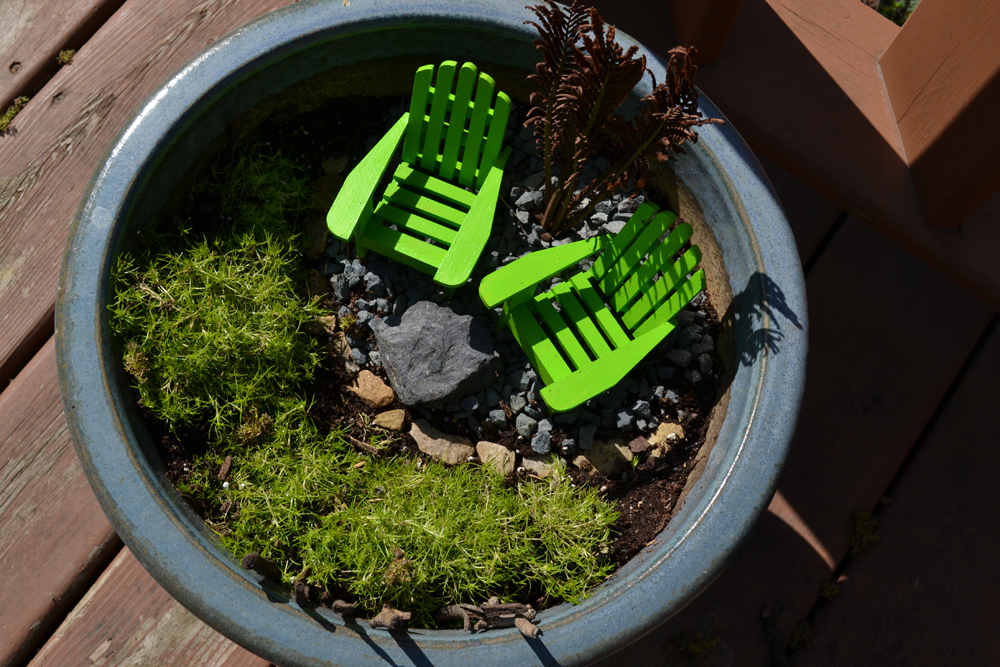
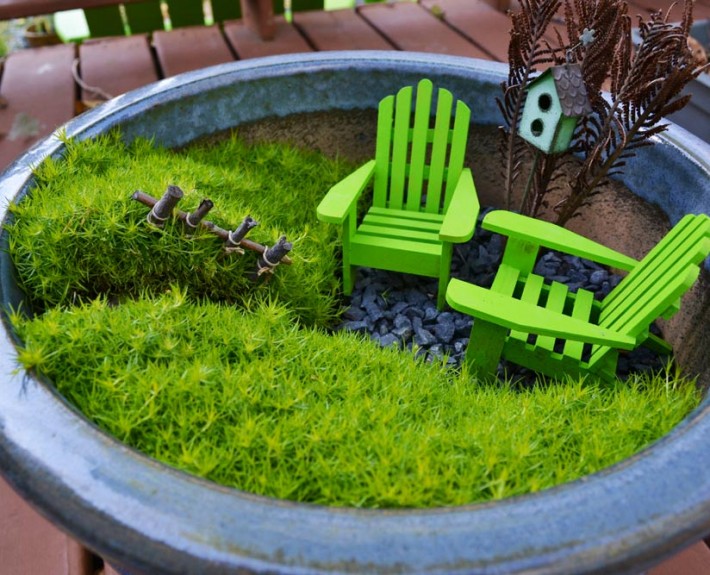
This mini garden is a large garden pot filled with soil. You could fill the bottom with rocks or foam and just top off with potting soil. Then we added some moss, some dried fern fronds and some blue stone gravel from our existing patio. We found some sharp flat rocks and made a little “flagstone” border.

We bought the adirondack chairs on Amazon and painted them lime green to match our real chairs. These were actually meant to be used as a cake topper!

Then we found some plain old twigs to start making a fence.

This whole garden (not including a pot, which we already had) cost less than $10 to make!

Mini gardening is fun for the whole family! It’s a great way to introduce children to gardening.


Sprout landscape Madison landscape companies

Sprout Landscape & Garden Celebrating 1st Year in Business!

Sprout Landscape & Garden Madison, WIThis week, our 2nd season is officially under way!

First of all, we’d like to thank you all for your interest in Sprout Landscape & Garden. We appreciate your support and look forward to another season working with you and your gardens.

In our first year, we had the opportunity to meet many people passionate about gardening. We worked with many new and existing customers on a variety of projects and also met a lot of other great people in the local gardening community. We truly appreciate time spent with other members at Olbrich Botanical Gardens, the Wisconsin Hardy Plant Society and the Madison Area Master Gardeners Association.

In 2015, we’re looking forward to continuing to help with your landscape needs, sharing new experiences, spreading new gardening knowledge, and maintaining our involvement in the community. Spring’s right around the corner, so let’s start planning!

An immeasurable amount of credit and thanks to my wife, Candy, who is the genius behind the Sprout Landscape & Garden brand. Her company, iCandy Graphics & Web Design, did an amazing job creating a site for our visitors to not only gain important information about our company, but provide a fun, stylish, and educational atmosphere to inspire gardening ideas.

Stay tuned for more blog posts with such topics as seasonal gardening tips, what’s in bloom, DIY projects, and back yard chicken and petscaping tips. If you have any topics you’d like to know more about, please submit ideas for future blog topics.

New to 2015:

Have an old paver patio that needs some reviving? Sprout is now offering hardscape restoration and sealing services. Hardscapes include features such as walkways, patios, retaining walls and driveways.

Benefits of sealing your new or restored brick paver patio, sidewalk or other hardscapes:

  • Maintain the appearance and integrity throughout the years.
  • Stabilize the sanded joints to prevent sand loss.
  • Inhibit moss and mildew growth.
  • Prevent ant hills and other insect activity.
  • Protects surface from winter salt and stains.
  • New products enable immediate applications.
  • Enhancing options include matte, semi-gloss and “wet-look” finishes.
  • Water-based products will not harm people, pets or plants.

Please explore our website for more information about our full line of landscape company services. Thank you again for your continued support. We look forward to working with you this upcoming season and beyond.

Happy Gardening and best of luck in 2015!

Sprout Landscape Owner Tim Phelps


Tim

Raising Baby Chicks

Madison chicken coop

Chicks Keeping Warm Under Heat Light

Thinking about raising chickens in your back yard? If so, now is a great time to start planning for your new flock. A fun way to begin is by raising your own baby chicks. While incubating fertilized eggs is an option, many folks choose to purchase newly hatched chicks from a local farmer or farm supply store. You can even buy them online and have them shipped! And newly hatched chicks are cheap… often as low as $1.99 each!

Before you get your chicks, make sure to be prepared for their arrival. First, you’ll need a brooder. This is simply a sturdy pen (such as a large box or storage tub) that will house and protect the chicks. A heat lamp should be securely attached to the brooder to maintain proper temperatures. In the first week, chicks will need the temperature at about 90-100 degrees! For the floor, use pine shavings or a similar material to cushion and help absorb moisture. Food and fresh water should be kept in the brooder so the chicks can eat and drink at will. Finally, interact with them as much as possible to get them used to being around people.

You may decide you want to raise 4 hens (the maximum allowed in the city of Madison) or prefer to start with just a couple. Either way, consider purchasing a few more chicks than you plan on raising. A chick may not be fully healthy when it arrives at your home and may not be strong enough to survive. Also, even when purchasing chicks being sold as “female”, there may still be males in the bunch. Since roosters are not allowed in town, you would have to find a new home for any accidental males. Lastly, as the chicks develop, you’ll start to notice character differences. Some will be more aggressive or skittish, while others seem more friendly and calm. A flock that gets along can really make it a more enjoyable experience for you and your visitors.

After they hatch, the new chicks will need about 6 weeks of TLC until they are feathered out and ready for the outdoors. A common time to get baby chicks is early-mid March. After those 6 weeks, they’re ready to head outside to the coop, just in time for spring!

Native gravel gardening

Madison Area Master Gardener Program Completion

As I hoped, the first year at Sprout Landscape & Garden was very busy. But from the beginning, I wanted to work in time to learn more about the local gardening community. To do so, I chose to enter the Wisconsin Master Gardener Volunteer training program through the UW Extension office. The program spanned an entire growing season, beginning in late February and wrapping up in early September. As of this past Thursday, I officially became a certified Wisconsin Master Gardener Volunteer!
Elvehjem School Garden Summer 2014

The Elvehjem Elementary School education garden- Summer 2014

I really enjoyed integrating the program into my schedule. It exposed me to plenty of new great gardening knowledge, tips and resources. Every-other-week classes covered very useful topics, such as soils, composting, garden-based learning for kids, tree and shrub pruning, insects, plant disease, weeds and invasive plants, organic garden techniques, vegetables, houseplants and more.

Besides the classes, the other main component of the program is volunteering. The program promotes volunteering with many local school gardens and other community gardens. I spent my volunteer hours at Elvehjem Elementary, the UW Extension education gardens, and Olbrich Botanical Gardens, totally nearly 100 hours of volunteer hours!

Every Thursday morning at Olbrich, I helped a small crew perform a variety of gardening tasks throughout the grounds. These including weeding, plantings, pruning, mulching, and fruit harvesting. I valued the hands-on experience, watching how the gardens changed throughout the year, and working with the friendly, down-to-earth staff and other volunteers.

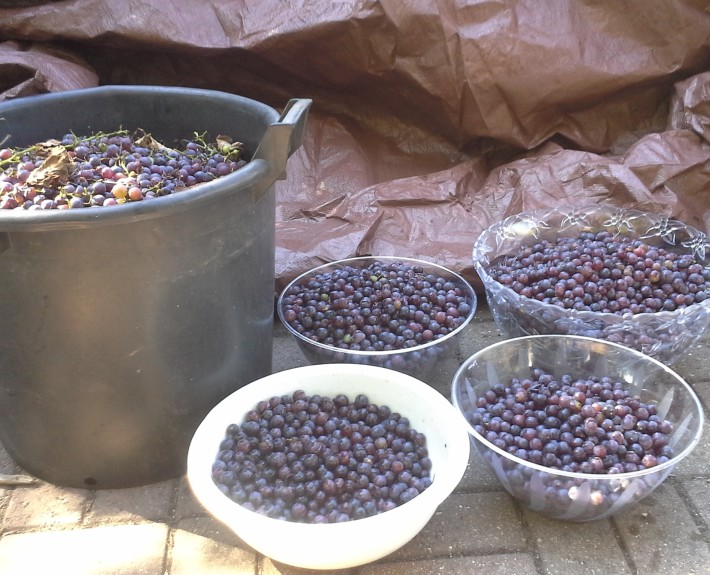
Grapes harvested by our volunteer group

Grapes harvested by our volunteer group

The community of Master Gardener’s is a close-knit group, and I appreciate becoming part of their movement for education and involvement in our community’s gardens.

Particular thanks to our instructor, Lisa Johnson, who’s personality and wealth of knowledge made for a fun, insightful program.

For more information on the Madison Area Master Gardener Association, please follow the link.

winterizing your chicken coop

Petscaping: Winter-izing Your Coop

As much as we don’t really want to think about winter yet, now is the time to start winterizing your chicken coop and taking steps to protect your ladies during the cold temps. Here in Wisconsin, we need to be take extra precautions in the winter due to extreme temperatures like last year.

Most grown chickens will survive winters in colder climates, but some breeds are hardier than others. (Chicks are another story, and we don’t recommend getting chicks as winter approaches.)

We have 2 buff Orpingtons and 1 black Australorp, which we chose because they are known for their docile personalities and being cold hardy. Some of the other cold-hardy breeds include Wyandottes, Rhode Island Reds, New Hampshire Reds, Barred Rocks, Delawares, Brahmas, according to our research. Cold hardy breeds may have smaller combs and wattles, thicker feathers, and be better layers during the winter.

The Coop

As new chicken owners, we find one of the trickiest things about winter is sorting through all the recommendations and warnings. It’s recommended to have a well-insulated coop with good ventilation, but not drafty, especially near the roost. How does one know what the right amount of ventilation or insulation is? I guess it’s a lot like parenting: you can Google questions all day long, but in the end, you may just need to use your instincts.

Because chickens spend a lot more time inside their coop in the winter, there is more moisture from their breath and from their droppings. Cold and damp conditions are unhealthy for your chickens and could even cause frostbite. If you notice your ladies’ combs and wattles looking whitish (rather than pink) try rubbing petroleum jelly on them every few days to protect them from frost bite. If this is an ongoing problem, it may be an indication you need more ventilation in the coop. Good ventilation allows dissipation of moisture, but a cold draft near roosting hens could be fatal.

Having a protected area away from the wind in your pen or yard gives your chickens room to scratch without getting chilled. We wrapped much of our pen in plastic last year (while maintaining adequate ventilation) as well as using clear fiberglass on top to keep snow out while letting sunlight in. If the area is snow and ice packed, add a thick layer of hay to help insulate their feet.

The Heated Debate

There is quite a bit of debate about whether one should heat a chicken coop or not. Most of the articles we have read recommend against it. Sources say most adult chickens can live in cold weather down to about 0 degrees Fahrenheit without issues.

A common argument against heating the coop is that a heat-lamp running all winter is a fire hazard. Others say preserving a warmer temperature causes chickens to feather out only in light down and not their full winter down. If you lose power for some reason, the chickens aren’t acclimated to the colder temperatures and could die. Wide fluctuation in temperature is reportedly harder on chicken constitutions than a consistent chill.

If you choose to heat your coop, make sure to hang the heat bulb with sturdy clips or on a permanent fixture away from where chickens can touch it. If you plan to have chickens for a long time, consider wiring your coop, which is much safer than using extension cords.

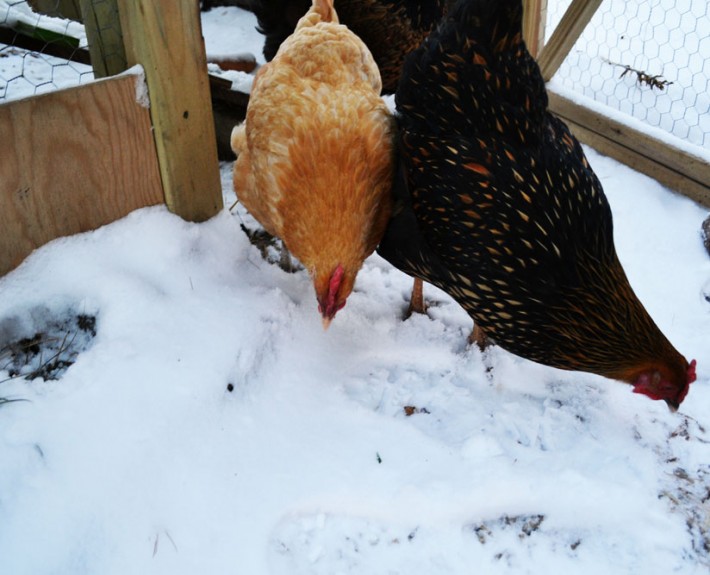
chickens in the snow

While our chickens didn’t want to walk on the snow, they did enjoy eating it!

Food & Water

Whether you choose to heat your coop or not, it is critical that your chicken’s water supply does not freeze! A heated base for your water feeder is invaluable in the winter. And chickens cannot live long without fresh water, so you still need to refresh the water daily. If you don’t have electricity in your coop for a water heater, you should bring the water feeder inside every night and return it in the morning. Then you should check the water once or twice during the daytime to make sure it’s not frozen, especially on really cold days.

Our chickens seemed pretty miserable during the winter last year, so we tried to make them a bit happier by giving them extra treats. They aren’t getting nutrients from grass, plants and bugs like they do in warmer weather, so their diets could use a few supplements. In addition to traditional feed, table scraps and vegetables will keep the flock hardy. A dose of cracked corn an hour to two before bed will help naturally increase their body heat to help keep them warm.  We also give them bird seed, oats, berries, dried meal worms and yogurt. Like with humans, yogurt reportedly boosts chickens immune systems. Plus it’s hilarious to watch them eat it.

We wish you luck getting yourselves and your flock ready for the winter. Let’s hope it’s not as cold as last year!

Miniature Gardening Ideas

It’s true that we’ve become a little obsessed with miniature gardening this year. Because of our backyard chickens, we must keep our tiny creations in pots or other containers on our deck so they don’t get destroyed.

Here are three mini gardens we created this year, which should give you some good ideas for your own tiny landscaping projects.

mini-gardening-ideas

Miniature Garden #1

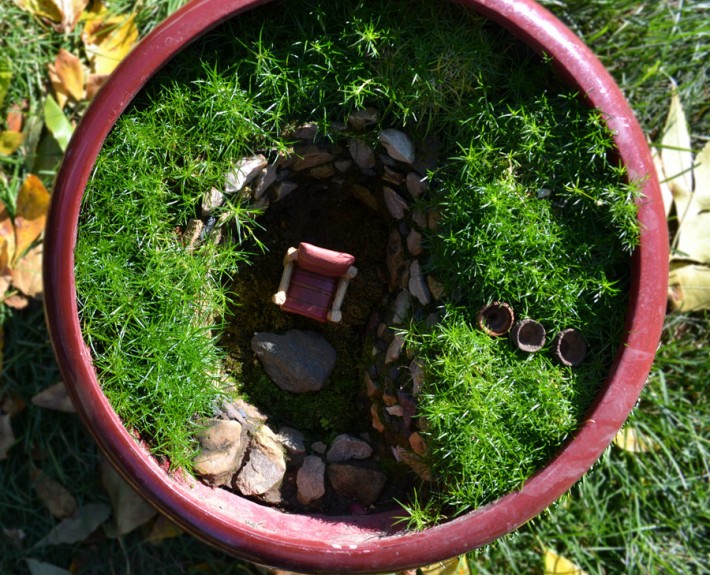
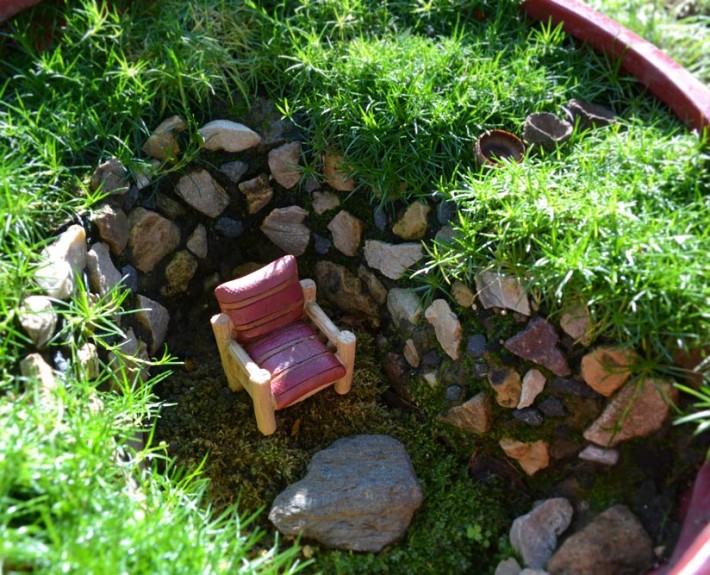
This garden was created in a standard planting pot. We filled it with potting soil and sculpted some little hills out of potting soil. We found some tiny rocks for the retaining wall and natural stone staircase. Note: you’ll need to use mud made out of a clay-filled dirt to hold these rocks together as the potting soil won’t hold together. Making the retaining wall was quite a lot of detail work and it get’s awfully messy, which is of course the best part! I like to keep a spray bottle of water handy when doing rock work like this.

mini-gardening-ideas-3

I used Irish moss for the top pathway, which took a few months to fill in as I didn’t have enough to quite cover the area. You will notice a few tops of acorns turned upside down on the top. Those don’t serve any purpose, but I like using natural materials as much as possible and acorns are so cute. Then I used some moss that I found in a stream bed by my lovely mother-in-law’s house for the ground. This moss doesn’t grow nearly as long as the Irish moss, so it was more suitable for the bottom of the garden so the chair stayed put. Also notice how it started to fill in between the rocks!

tiny-landscapes

Miniature Garden #2

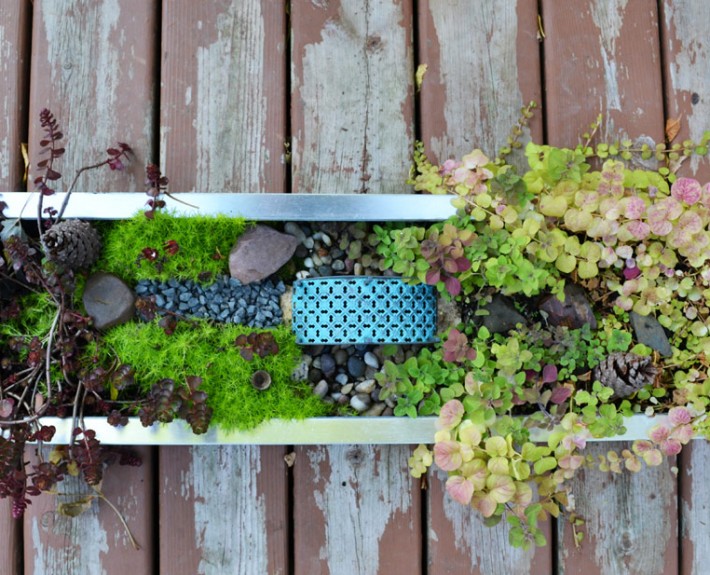
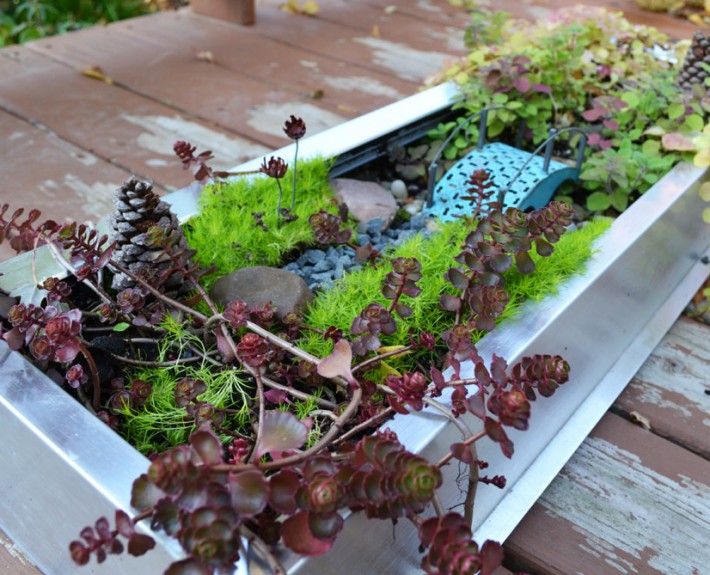
This miniature landscape was created in a used Medicine cabinet that I found at the ReStore. You’d be amazed at the stuff you can find there, and it made for an interesting container. The main feature of this mini garden is the metal bridge, which I bought here in Madison at Olbrich Garden’s gift shop. They have some adorable pieces that you must check out if you are a mini gardener.

tiny-landscapes-2

For the plants, I used sedum, which is my favorite groundcover / succulent. You can see a different variety of Irish moss that is cut by a blue stone path. The other side of the garden is covered with oregano, which I discovered is a nice low growing plant for tiny landscapes. And then you’ll see the creeping Jenny pouring out of the sides. This may be a bit of a rambunctious grower for a mini garden, but it has some nice fall color, doesn’t it? I sprinkled some pine cones and other natural rocks around, and created a dry riverbed beneath the bridge.

fairy-garden-ideas

Miniature Garden #3

This garden has already been featured on this blog, but the moss has filled in so nicely that I wanted to show you an updated photo. Click here to read the original article.